The Static Site Guide • Chapter 8
Setting up Continuous Deployment
You probably don’t need me to tell you this, but some of the technology available today is incredible, if not downright magical. It can automate manual tasks at the push of a button and turn previously tedious tasks into an invisible afterthought. That’s how I like to think about the topic of this chapter: Continuous deployment.
Before setting up version control, we manually deployed changes to our website. We built the site using the Hugo command line utility and then dragged and dropped the heroic-tiramisu/public folder onto the Netlify website. It was easy work, but it was also tedious. Now that we’re using Git and GitHub, there’s a better way of deploying changes.
Continuous deployment is a feature that automatically builds and deploys our website to Netlify when we merge changes into the main branch on GitHub. In a nutshell, it works by creating an isolated environment on a server to check out the GitHub repository, build our website, and deploy the changes.
The idea is that changes to our website should never wait too long before being deployed. From now on, we’ll deploy changes automatically and continuously as we merge them so that our production website is always up-to-date with the changes in our main branch.
💡 Tip: The instructions in this chapter are written for Netlify, but you can apply the same principles to any hosting provider. Continuous deployment is a widely available feature!
Connecting Netlify to GitHub
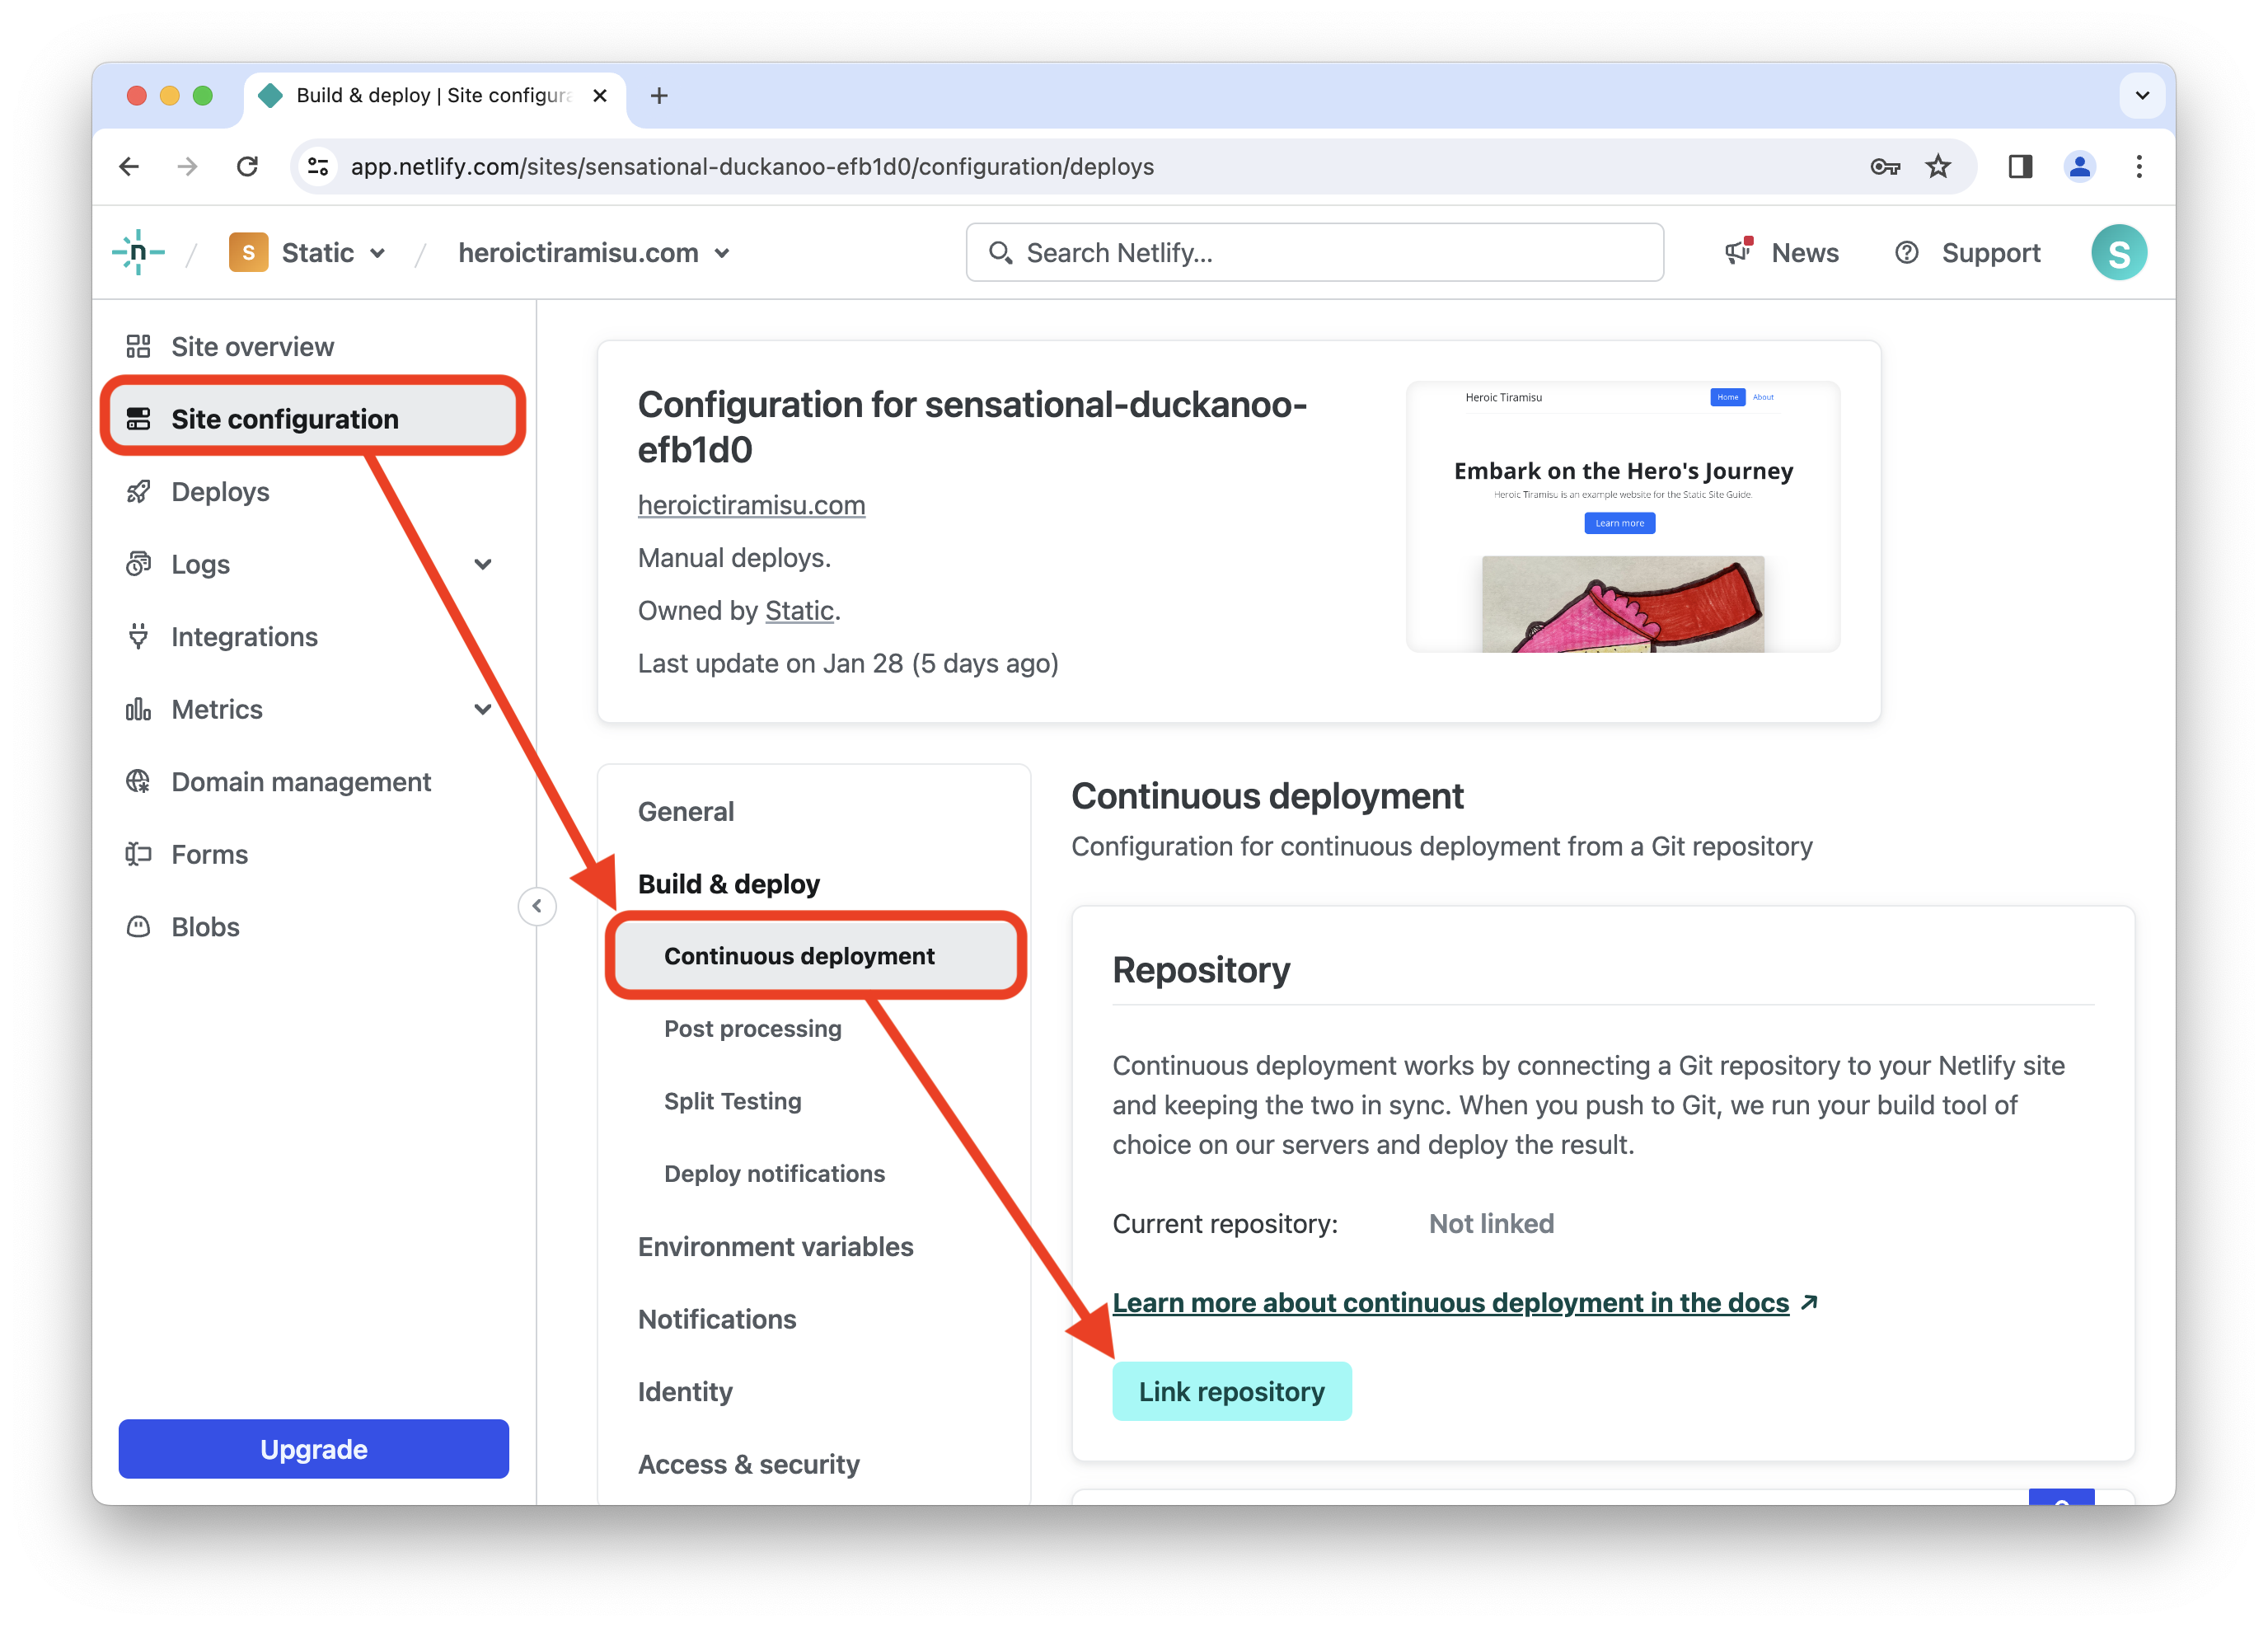
We’ll enable the continuous deployment feature for our site in Netlify by linking our GitHub repository to our Netlify account. To do this, log in to Netlify, click Sites, and then select your website. From the sidebar, click Site configuration, and then click Build & deploy.
The continuous deployment settings are in the Continuous deployment section, as shown below. Click the Link repository button.
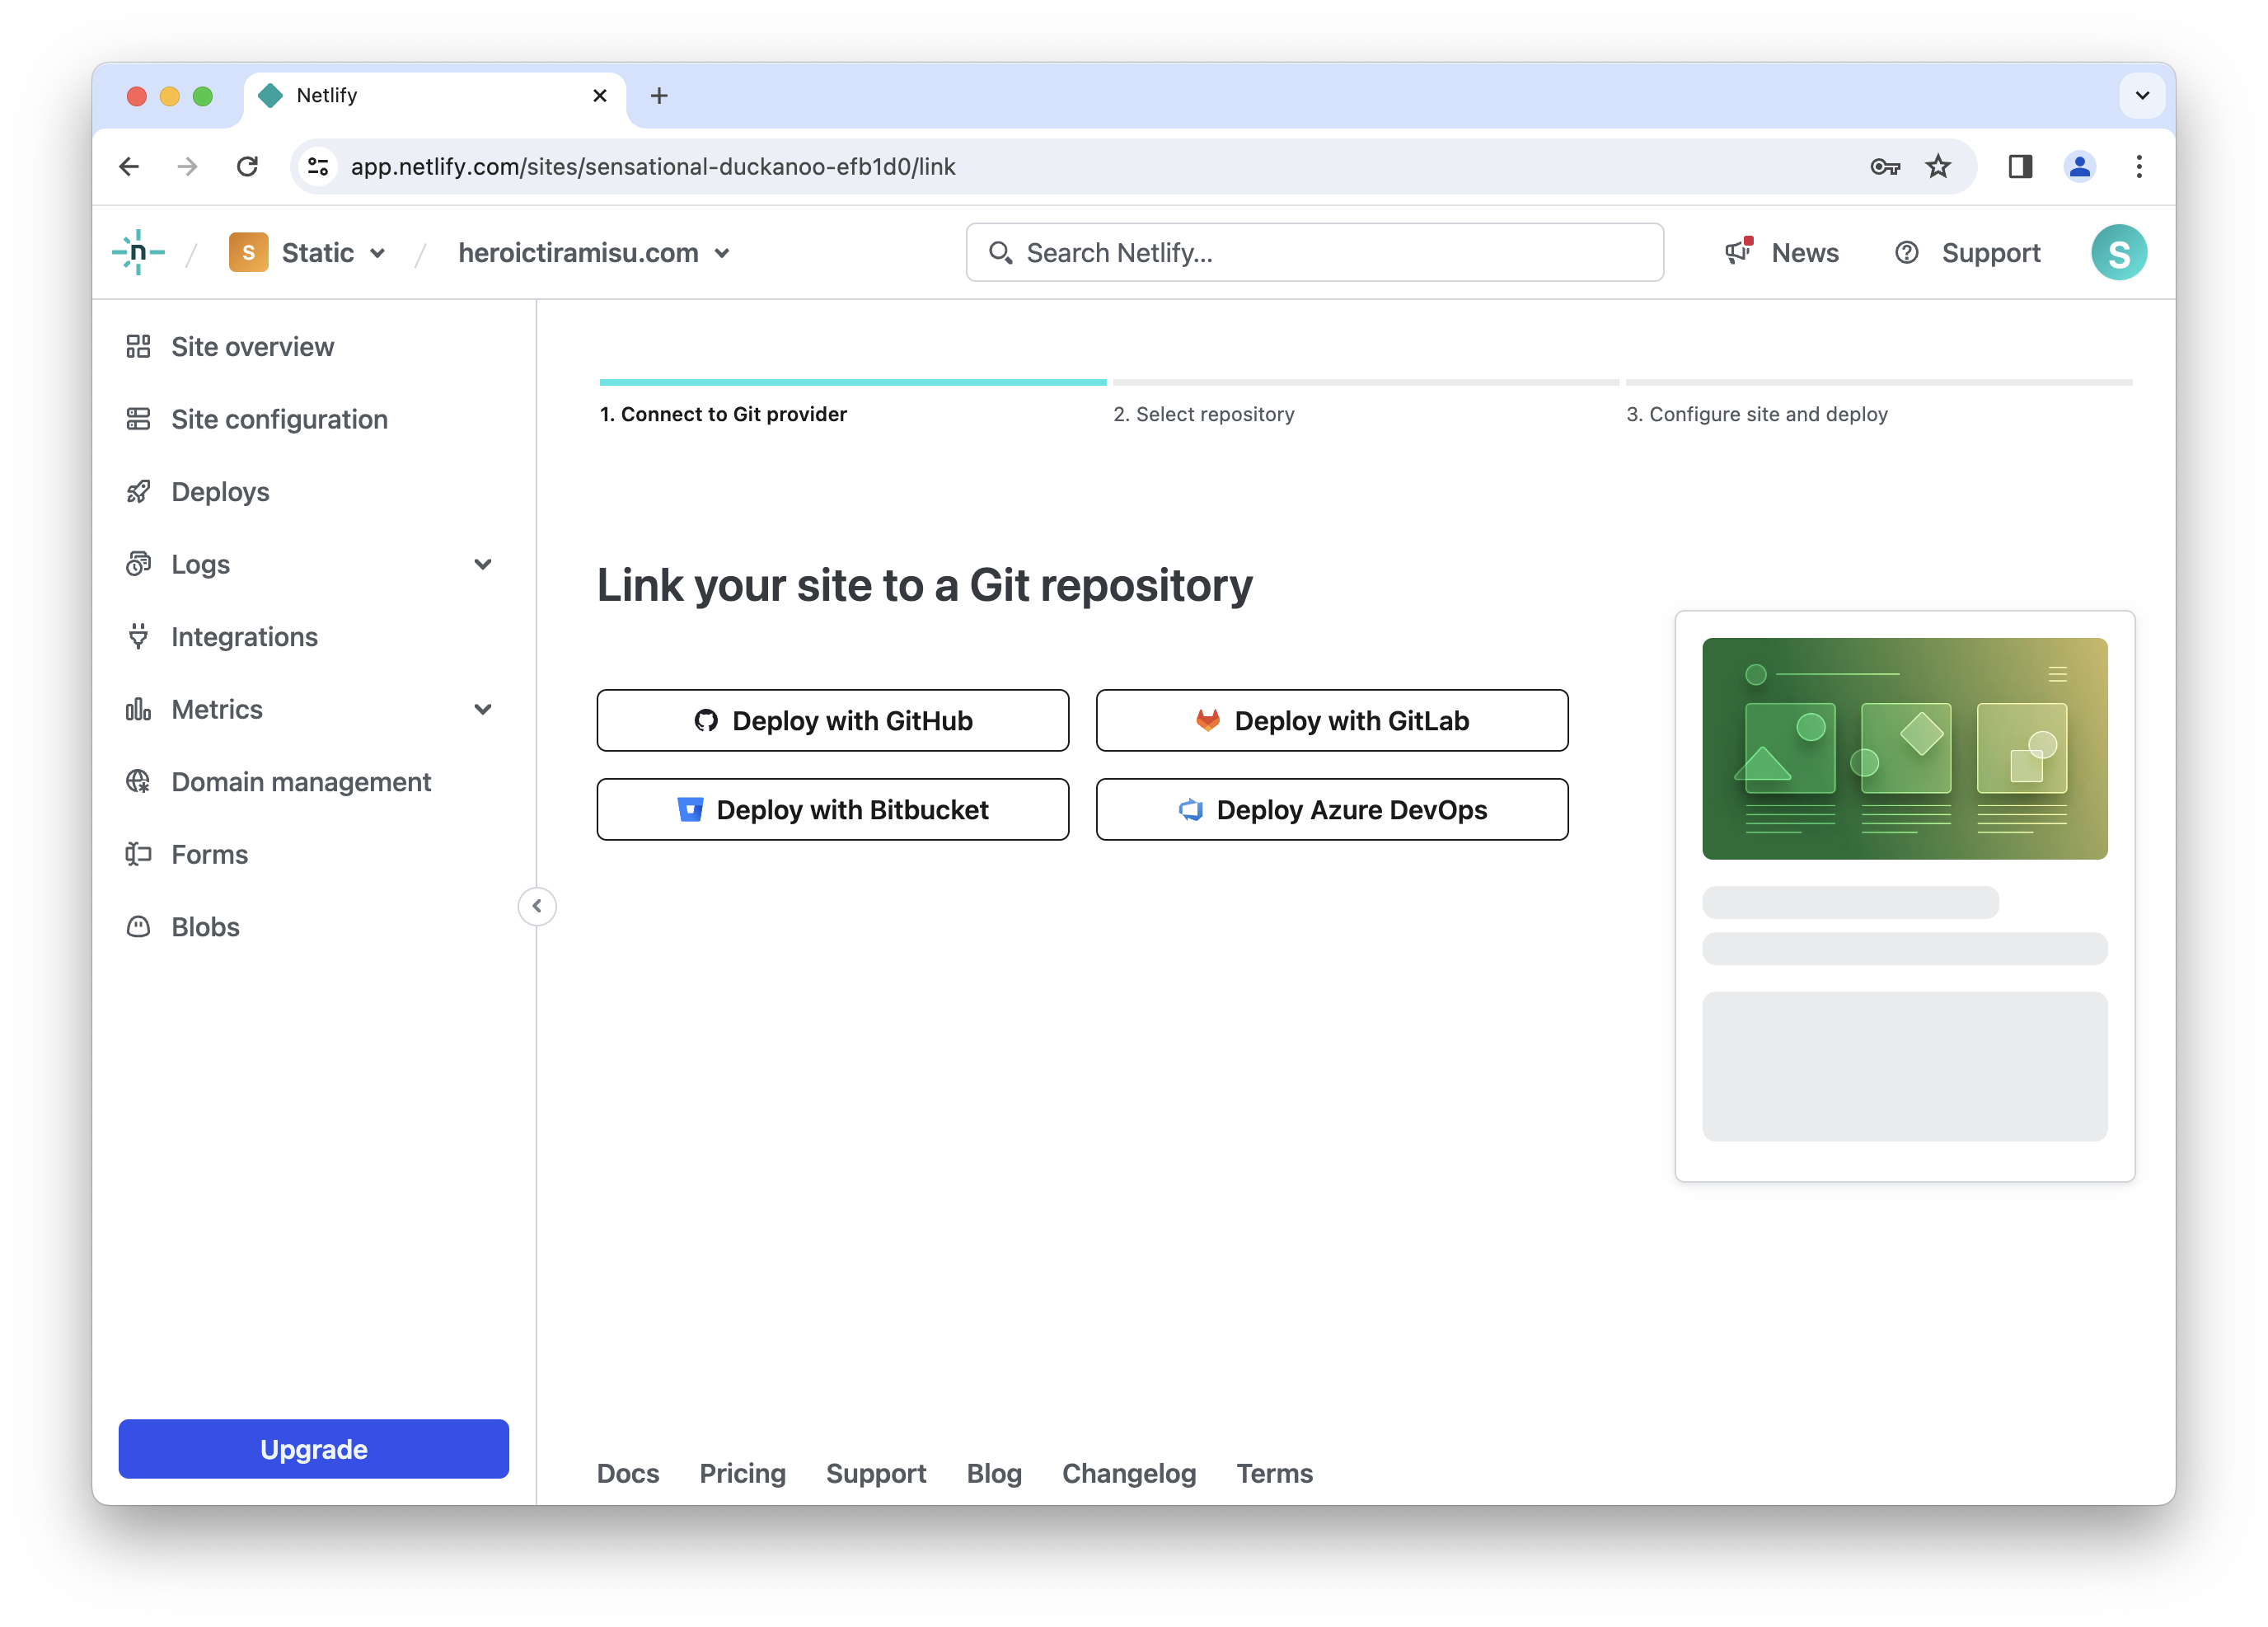
Click the Deploy with GitHub button, as shown below.
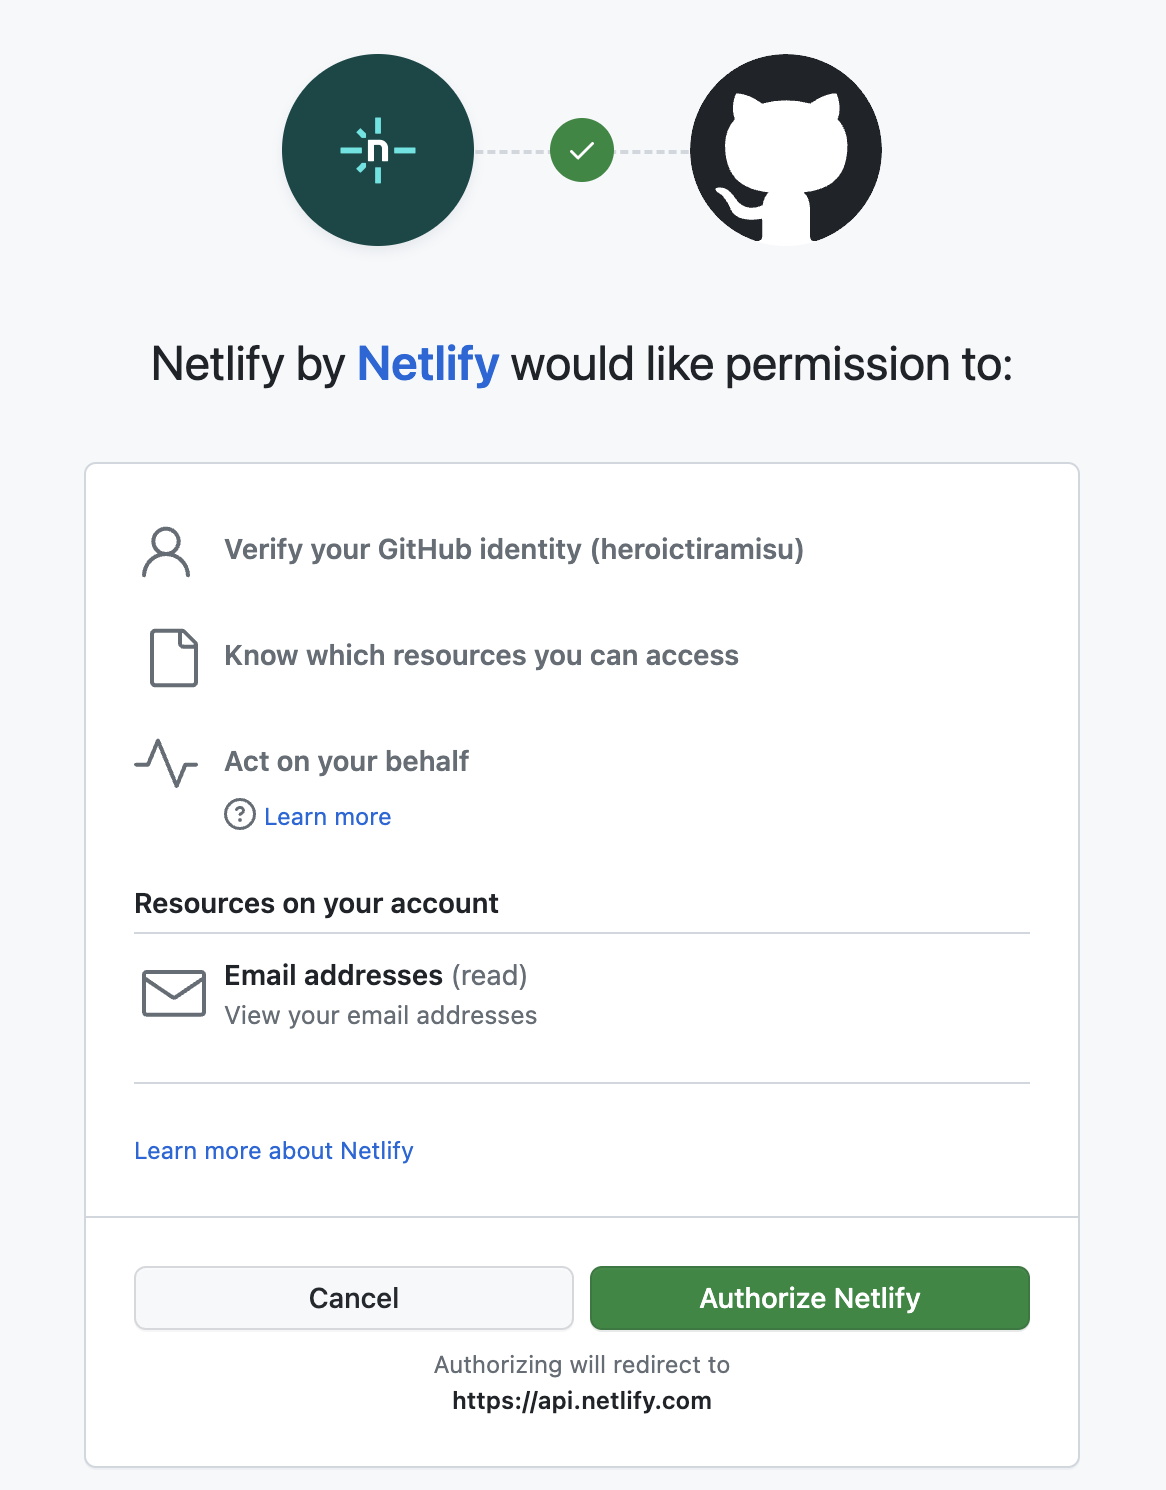
The page shown below will open in your web browser. Click Authorize Netlify.
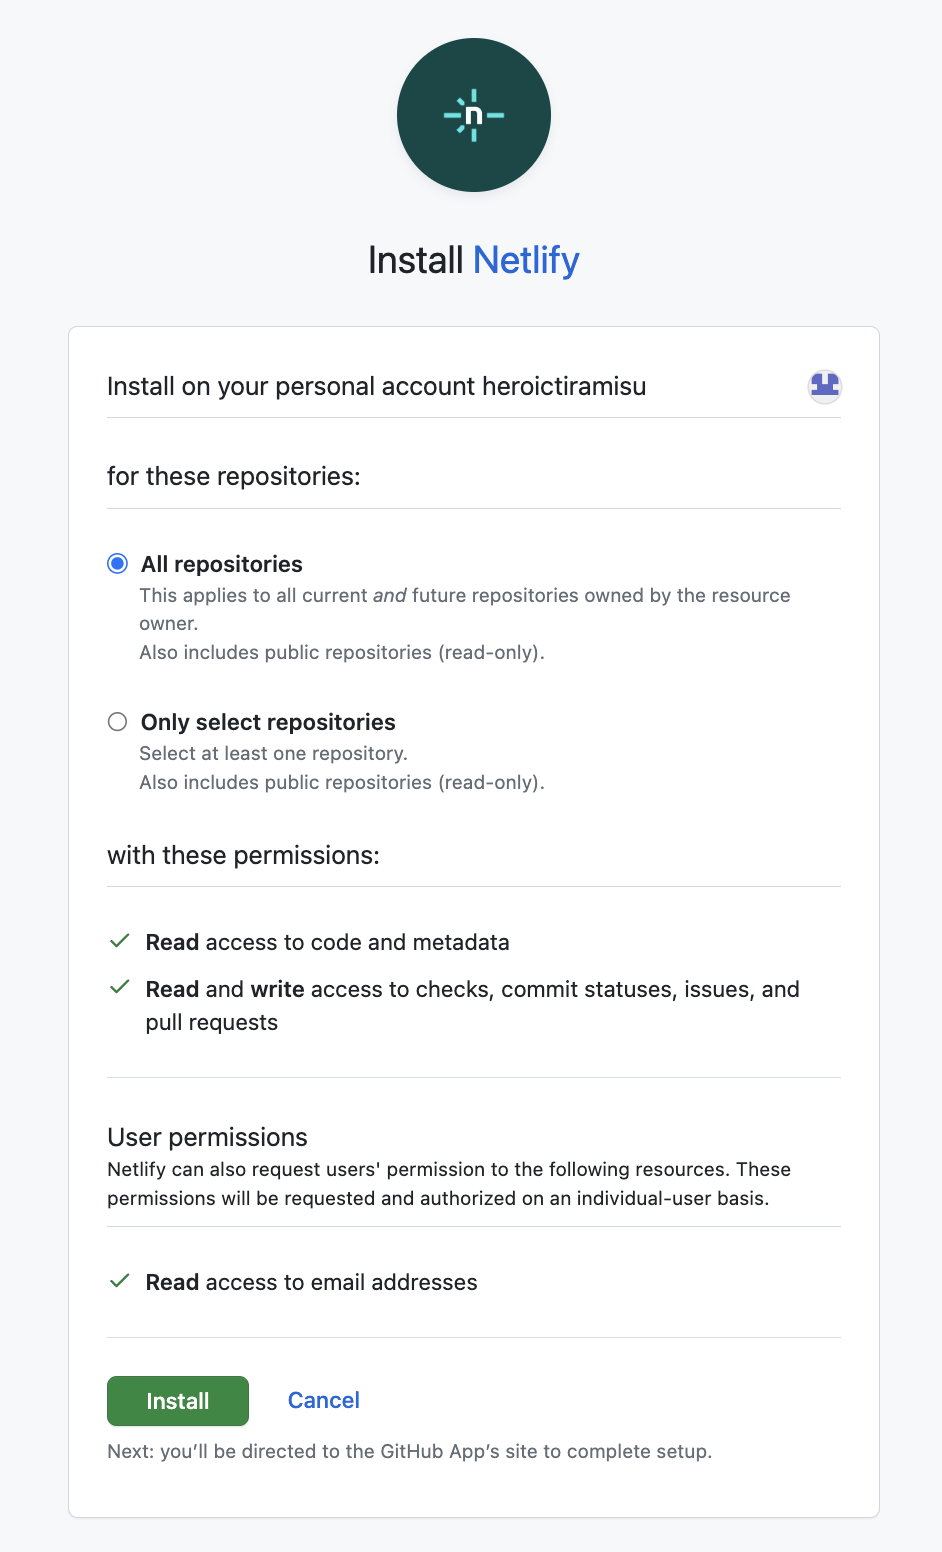
Next, click Install to install Netlify for all of your repositories on GitHub, as shown below. You’ll need to enter your GitHub account password.
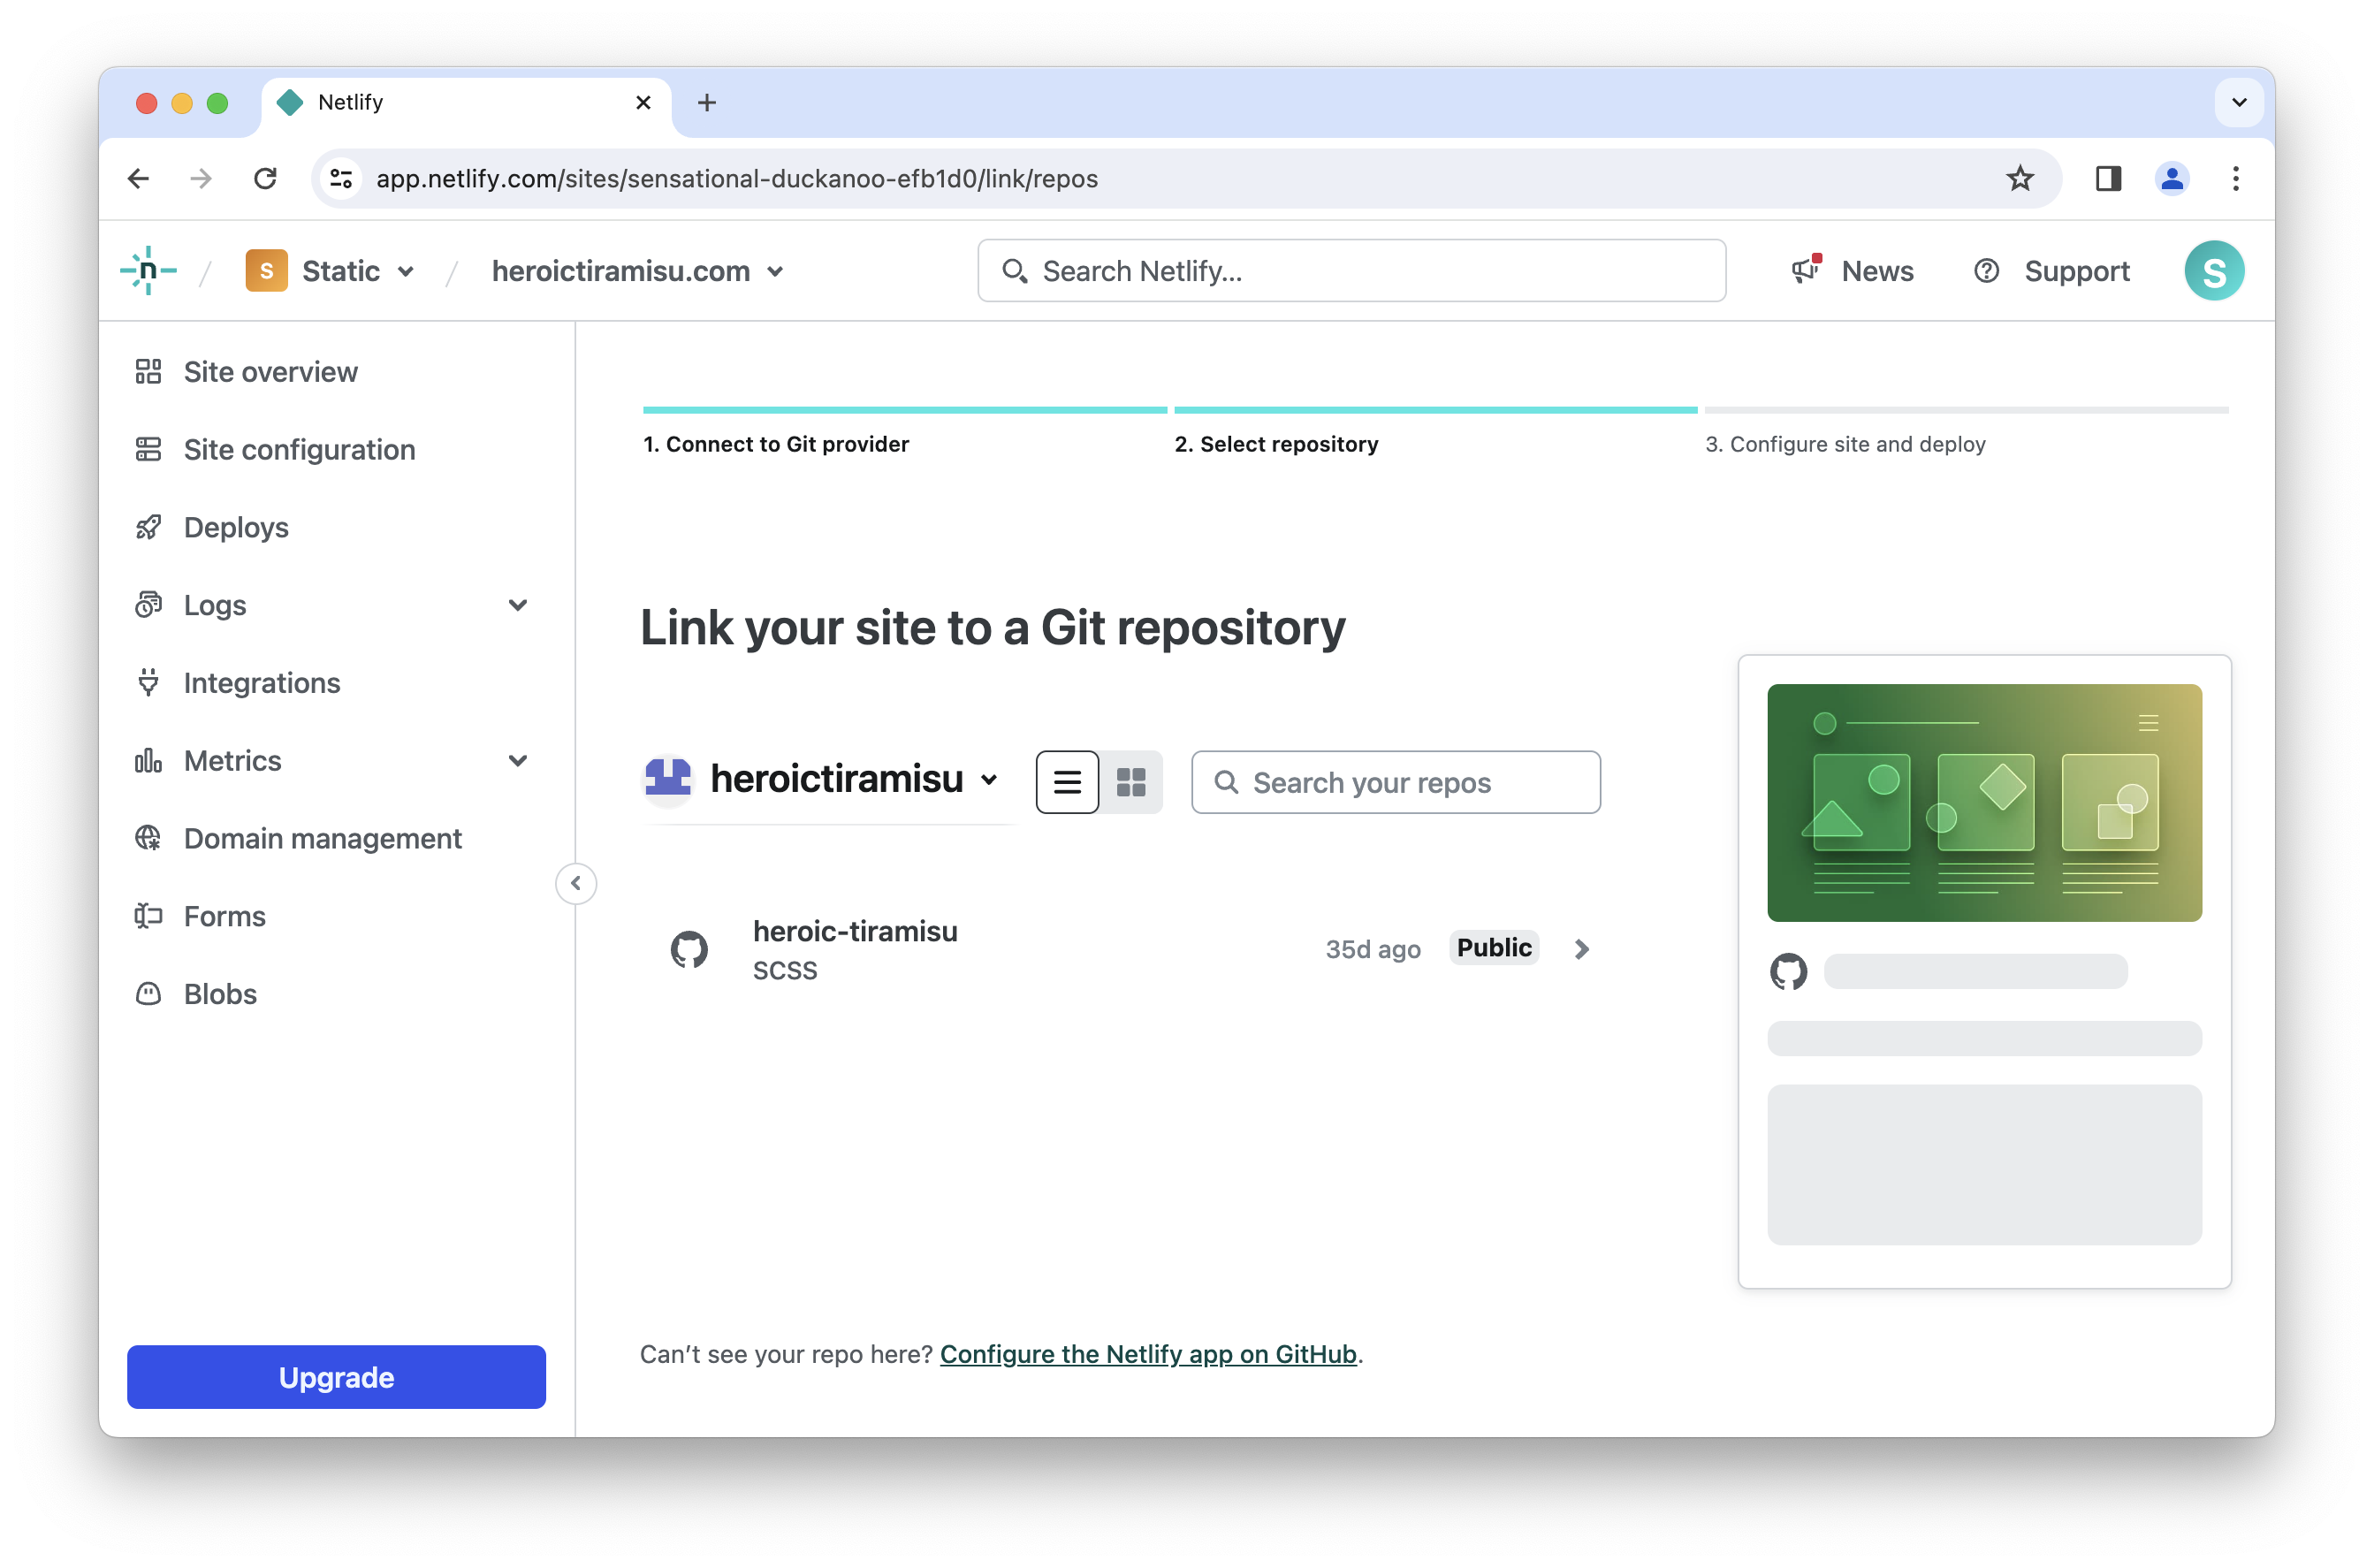
Back on the Netlify website, select your website’s repository, as shown below.
On the next page, you’ll see settings related to how Netlify builds your website. You can leave these set to their default values. Netlify can automatically detect that you’re building a Hugo website, and it will use the hugo command. After you’ve reviewed the settings, click the Deploy button.
Netlify will check out your repository, build your website, and deploy it. We’ve set up continuous deployment! The next time we push a change to the main branch, Netlify will automatically deploy it to our website.
Making a Test Change
Let’s make a test change so we can see how continuous deployment works in practice. We can do this by editing the blog post we created in the previous chapter, pushing it to GitHub, and watching Netlify automatically deploy it.
First, switch the GitHub Desktop and make sure you’re working in the main branch. We’re not going to use a feature branch for this change.
💡 Tip: I don’t usually recommend pushing changes directly to the
mainbranch. In most cases, it’s better to use a feature branch. However, because this is a small change that doesn’t impact much of anything, it’s safe to push the changes to themainbranch. You’ll learn to make determinations like this as you become more familiar with Git.
Next, in VS Code, make a small change to your newest blog post. I changed the title of my blog post from Even More Bacon to Even More Bacon, Now With Continuous Deployment!, but any change will do. When you’re finished editing the file, save your changes.
Back in GitHub Desktop, commit the changes to the main branch, and then push the changes to GitHub.
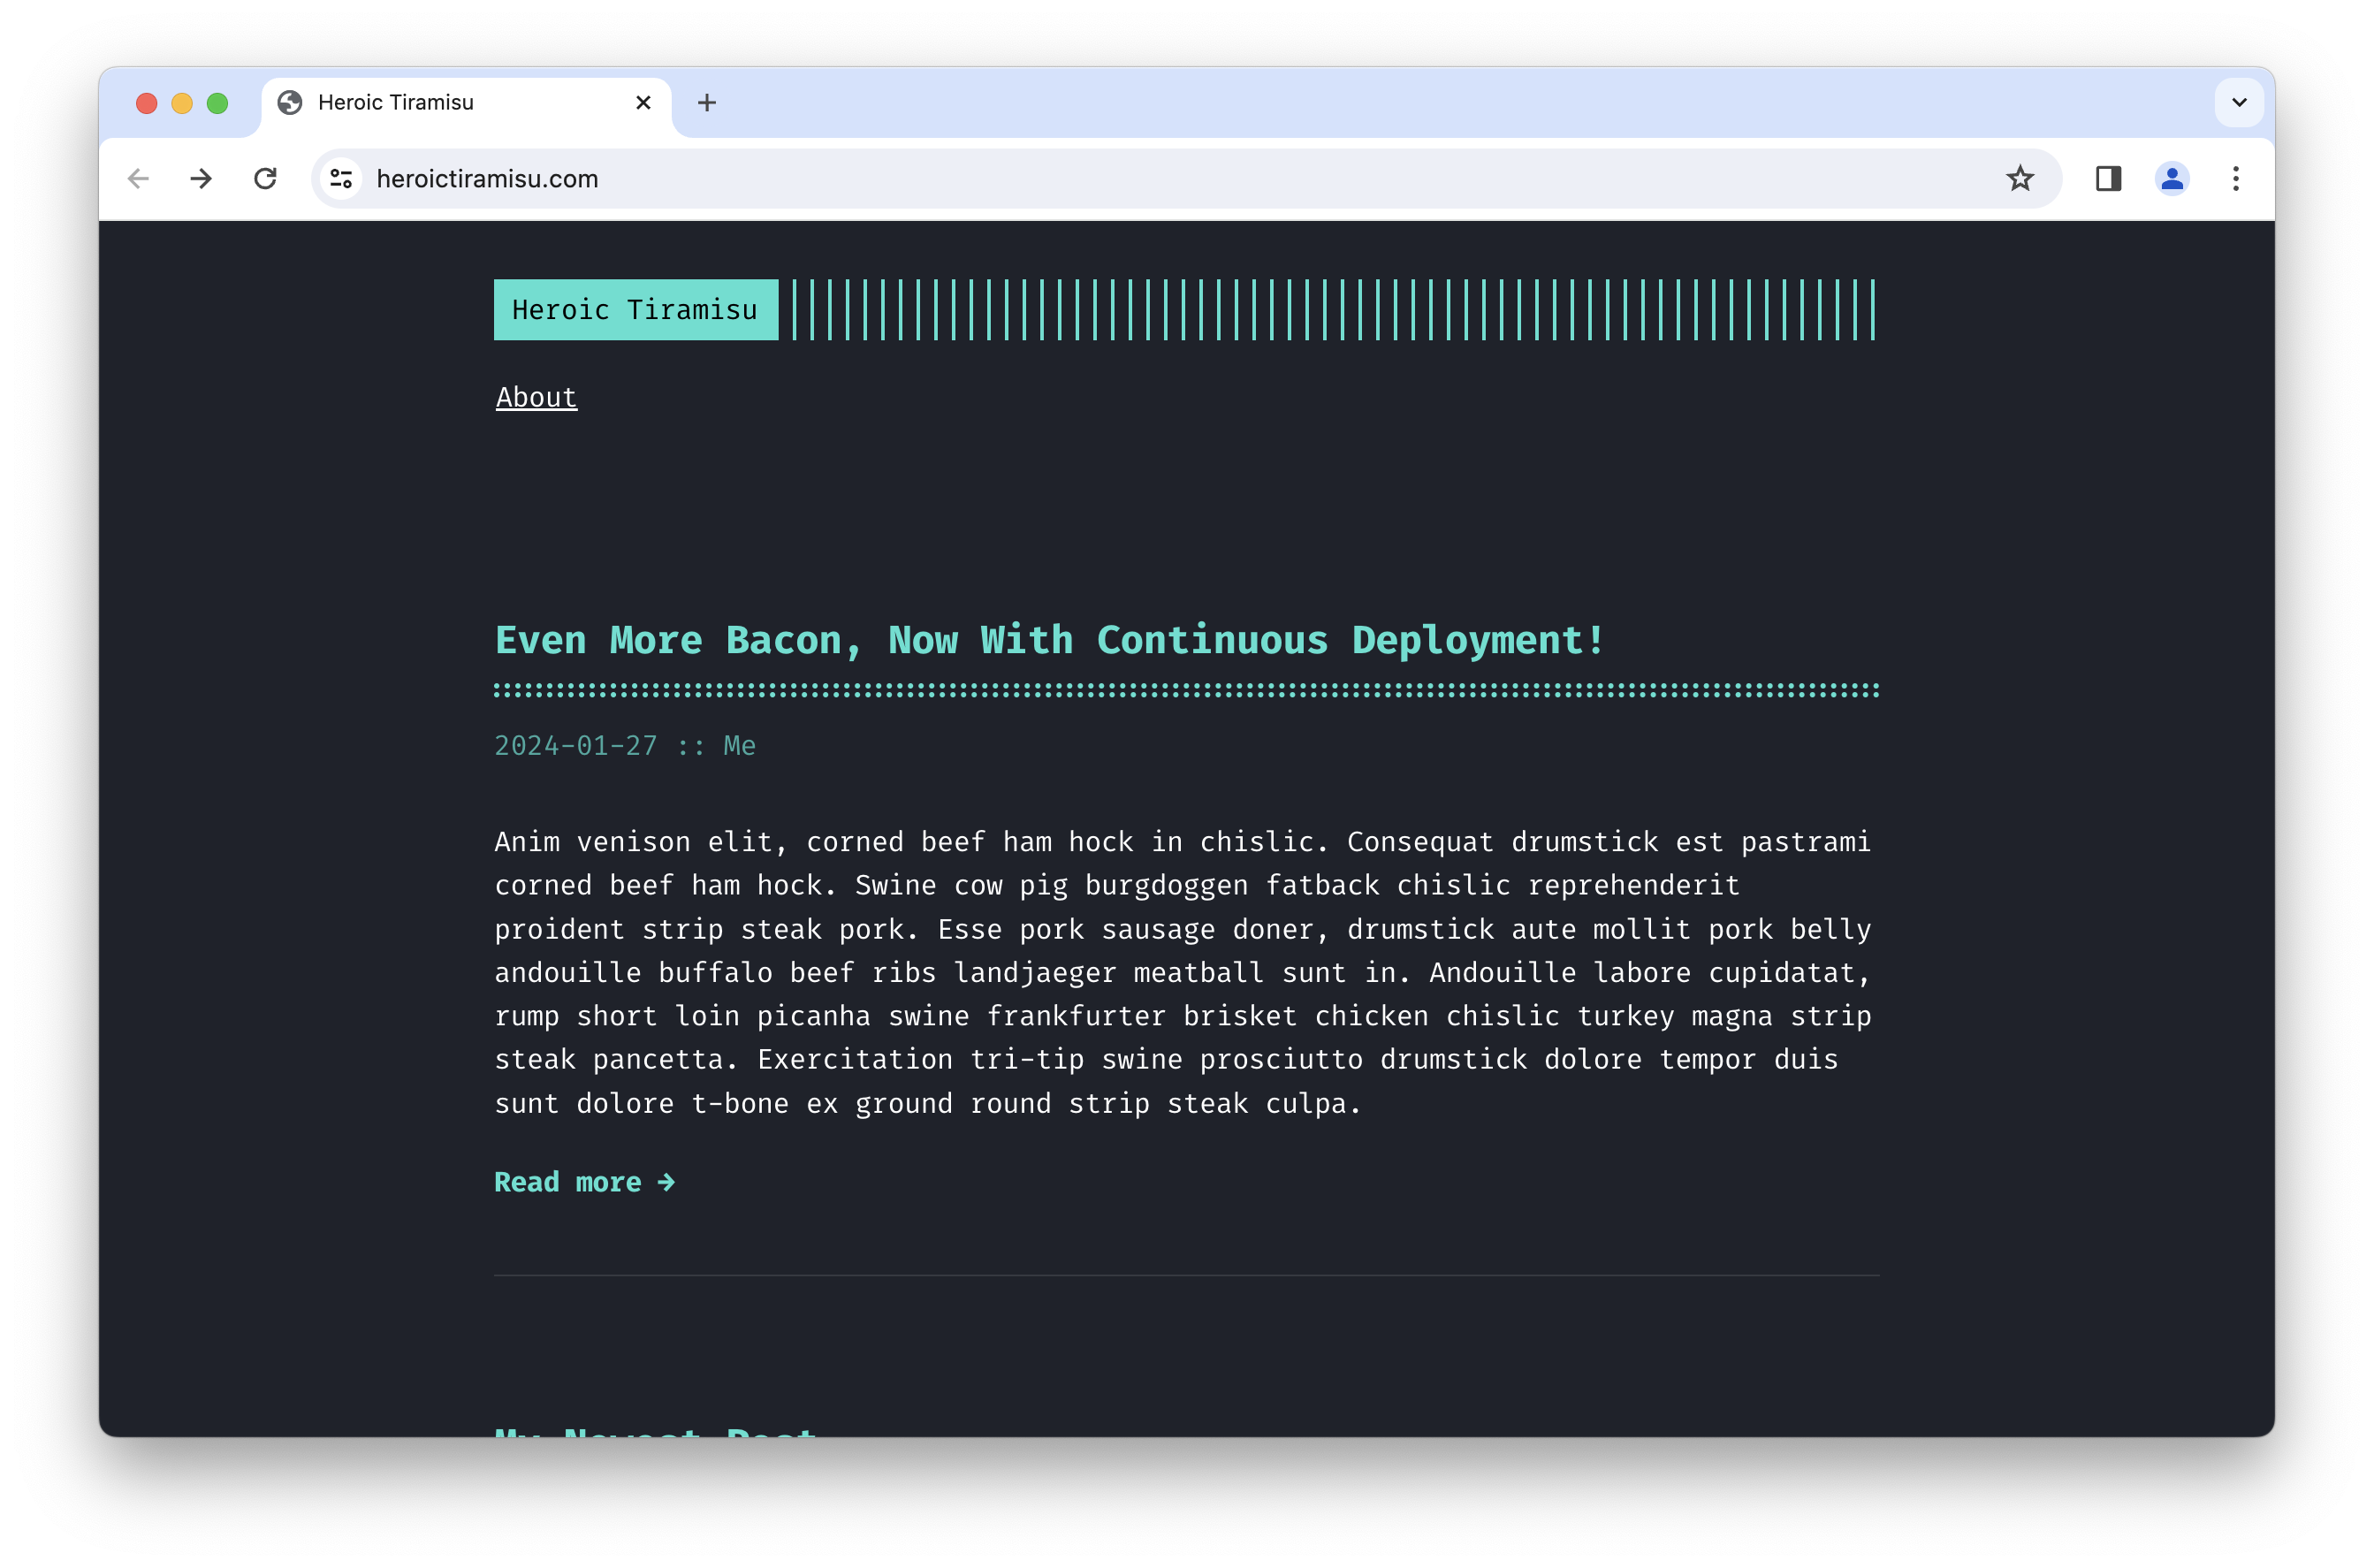
Wait a couple of seconds, and then open your website in your web browser. You’ll see the changes live, as shown below.
Now we’re sure that continuous deployment is set up and working. In the future, any changes we push to the main branch will be automatically deployed to our website.
Creating a netlify.toml File
Earlier in this chapter, we configured our repository’s continuous deployment settings using the Netlify website. There’s a better way of doing that. Using file-based configuration, we can add settings to a file in our repository that Netlify can read at build time.
In this section, we’ll create a file called netlify.toml that will tell Netlify how to build and serve our website. You can refer to Netlify’s documentation to learn more about netlify.toml files.
💡 Tip: The settings in the
netlify.tomlfile will override the build settings we specify in the Netlify website.
Using VS Code, copy and paste the following content into a new file called netlify.toml and save it in the heroic-tiramisu directory.
[build]
  command = "hugo --gc --minify"

[context.production.environment]
  HUGO_VERSION = "0.125.3"

[[headers]]
  for = "/*"

  [headers.values]
    X-Frame-Options = "DENY"
    X-XSS-Protection = "1; mode=block"
    X-Content-Type-Options = "nosniff"
    Referrer-Policy = "strict-origin-when-cross-origin"
Let’s talk about what’s going on here.
Build and Environment Settings
First, we provide the command for building the website. The build command (hugo --gc --minify) is recommended in the Hugo documentation for Netlify. The gc flag removes unused cache files, and the minify flag minifies HTML content to reduce the size of our files so they can be delivered faster.
Next, we specify the version of Hugo that Netlify will use to build the site (HUGO_VERSION = "0.125.3"). New Hugo releases can add features that unexpectedly change the look and feel of our website. We eliminate the potential for surprises on our production website by specifying a version of Hugo that we’ve tested.
HTTP Headers
HTTP headers pass information with the body of the HTTP request to the client. These headers will prevent our website from being misused and our content from being hijacked. They come on the recommendation of Mozilla Observatory, a free tool that scans your website and makes security recommendations.
| HTTP Header | Description |
|---|---|
X-Frame-Options = "DENY" | Prevents your website from being embedded on other websites. |
X-XSS-Protection = "1; mode=block" | Protects your website against cross-site scripting attacks. |
X-Content-Type-Options = "nosniff" | Prevents clients from guessing the type of content you’re linking to. |
Referrer-Policy = "strict-origin-when-cross-origin" | Protects the privacy of your visitors. When they click on a link to another website, their information won’t be shared with that website. |
For our website to get a perfect score on Mozilla Observatory, we’d also need to create a Content Security Policy (CSP). If you’re feeling ambitious, try making one yourself. Refer to the MDN and Google documentation on CSPs.
Redirects
There aren’t any redirects in our netlify.toml file yet, but I wanted to mention them since they’re so important.
Because the internet is an interconnected series of links, you should create a redirect when you move or remove a web page. Redirects tell other websites that you’ve moved content on your website. They also reroute visitors from one URL to another.
For example, if you move a recipe for almond brownies to a new web page with all of the brownie recipes and remove the web page for almond brownies in the process, you should redirect traffic from the old web page to the new one. You need to add the redirect because you don’t know who may try to access the old web page in the future. Websites may continue linking to the old web page, and readers may have it bookmarked. Instead of showing visitors a 404 Not Found page when they try to access the old web page, you can redirect them to the new web page.
You can add redirects to the netlify.toml file using the following format.
[[redirects]]
  from = "/recipes/almond-brownies"
  to = "/recipes/brownies"
  status = 301
💡 Tip: Netlify also allows you to add redirects in a dedicated
_redirectsfile. This is convenient for people who have hundreds of redirects.
Deploying the netlify.toml File
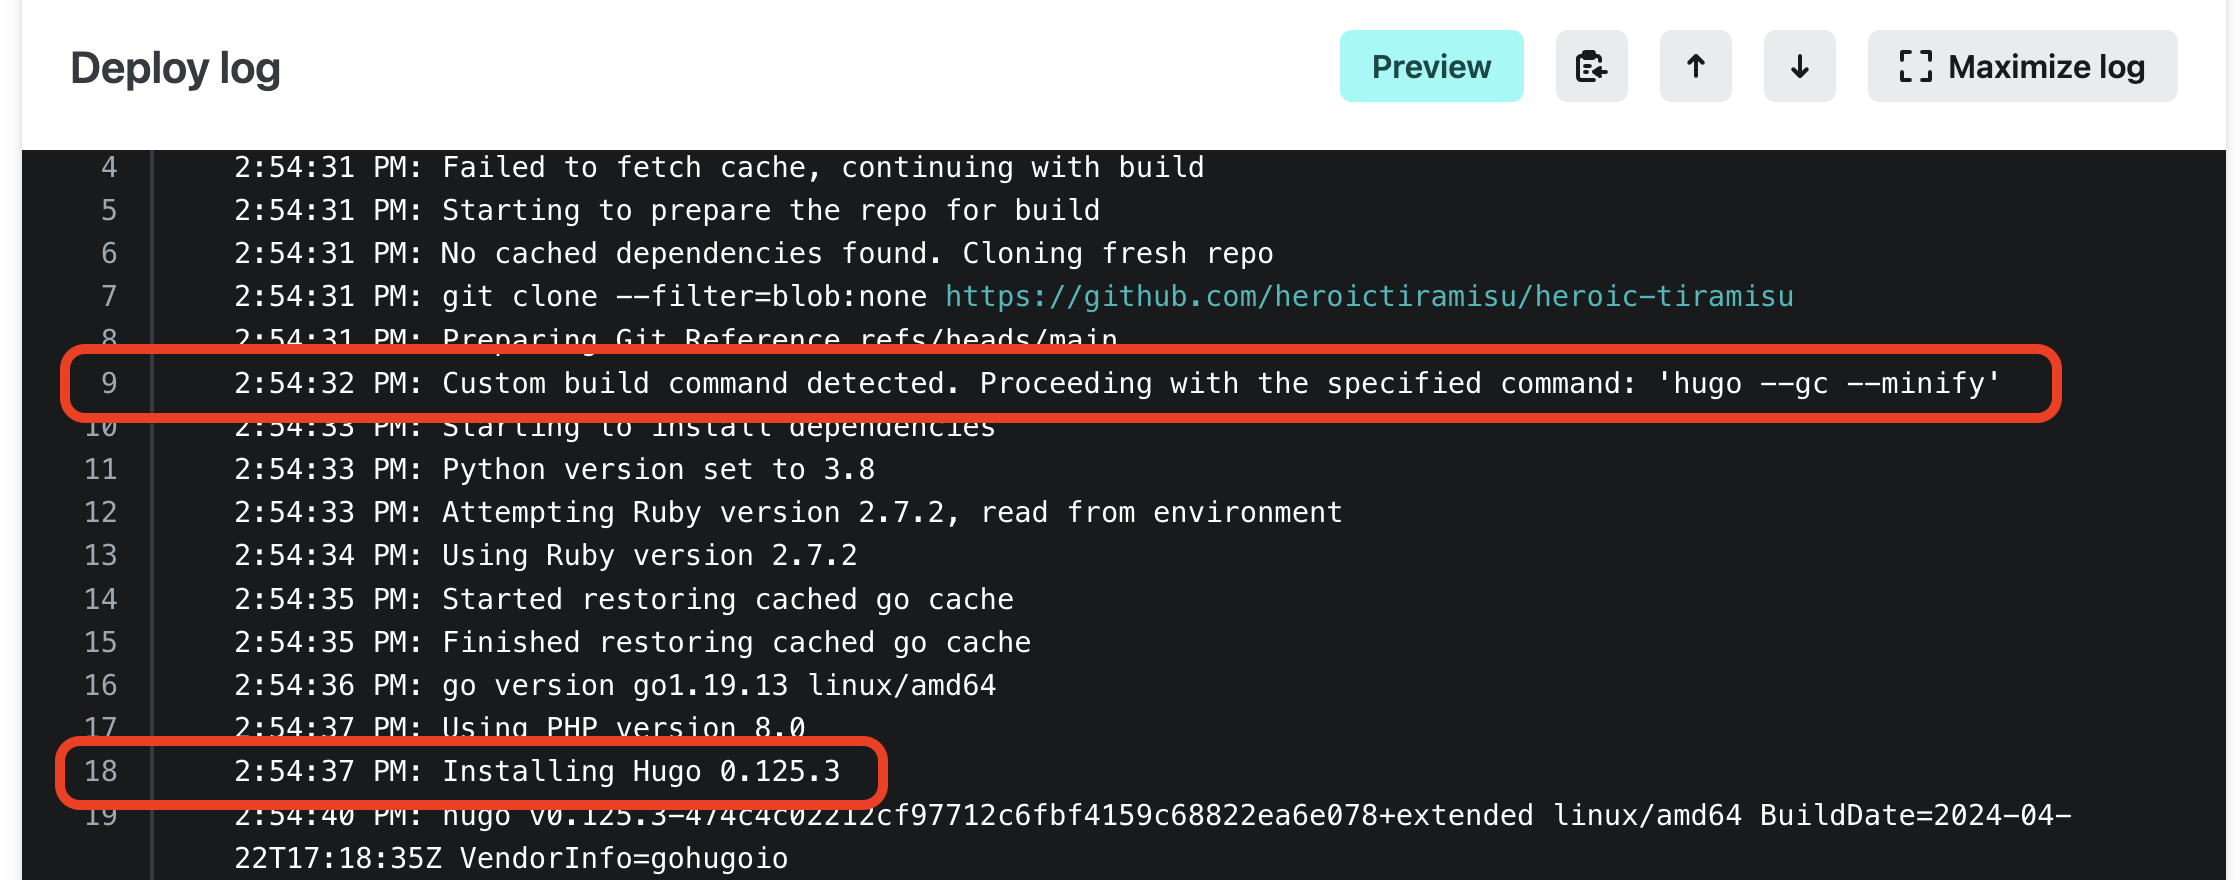
Back in GitHub Desktop, commit the changes to the main branch, and then push the changes to GitHub. If you look at the build logs on the Netlify website, as shown below, you’ll see that the settings in the netlify.toml file were used to build the website.
If we decide to change how Netlify builds our website in the future, we can update the netlify.toml file again.
Next Steps
We focused on continuous deployment in this chapter, but it’s worth noting that continuous deployment has a twin sister: Continuous integration. When they’re used together, you’ll see the two abbreviated as CI/CD. Like continuous deployment, continuous integration runs when you merge changes into the main branch, and it uses the same isolated server environment. The difference is the type of work it does.
Continuous integration is focused on testing and non-deployment-related tasks. For example, we could use it to check our blog posts for broken links and misspelled words. If a test doesn’t pass, we could fail the build so that our website wouldn’t deploy. That could be incredibly useful for a media company that can’t afford to publish articles with misspelled words.
You can also run shell scripts as part of continuous integration. There are so many things you could do with this! For example, say you’re a local news organization that wants to display regional weather alerts in your website’s navigation menu. You could write a shell script that queries the National Weather Service’s API and inserts an icon in the HTML for your navigation menu if there’s a current weather alert.
If you’re interested in continuous integration, I recommend trying GitHub Actions. It’s integrated with GitHub, it’s highly configurable, and it’s free for public repositories.