The Static Site Guide • Chapter 6
Using a Custom Domain Name
One issue we need to address is our domain name. The random, unique domain name that Netlify generated for our website (https://sensational-duckanoo-efb1d0.netlify.app/) has been useful for testing, but it’s not something we want to use forever.
There are a couple of problems with this URL. For one thing, it’s too hard to remember. We could use Netlify’s settings to change it to something more memorable, like mywebsite.netlify.app, but it would still be a mouthful. The biggest problem is that Netlify owns our domain name. If Netlify changes its terms of service or goes out of business, we could lose control of our website’s unique address. That’s not an acceptable risk.
In this section, we’ll purchase a custom domain name (e.g., mywebsite.com) for our website. A custom domain name provides us with a memorable, easy-to-remember brand name for our website. It also provides us with peace of mind. We’ll own our custom domain name free and clear. If Netlify ever went out of business, we could simply move our website and point our custom domain name at the new hosting provider—visitors wouldn’t even know anything had changed.
Searching for a Domain Name
The first order of business is finding an available domain name. Domain names are like home addresses: Each one is unique and can only be registered once. There’s only one google.com, for example. Once a domain name is registered, it’s off the market and can’t be used by anyone else.
There are websites you can use to find available domain names. I like using Namecheap. Just type the domain name in the search field and you’ll be able to see if it’s available, as shown below.

💡 Tip: Don’t buy your domain name yet! In the next section, I’ll share my recommendation for purchasing the domain name.
The ideal domain name is easy to say, easy to remember, and ends in the .com extension. The bad news is that virtually every memorable .com domain name has already been registered. You’ll figure this out pretty quickly once you start searching for domain names. The good news is that there are still some decent options available to newcomers.
There are three reliable ways to come up with a domain name:
Combine two words or create a new word. Combining words is probably the easiest way to come up with a new domain name. Think of Coinbase, Cloudflare, DigitalOcean, SendGrid, and others. Or you can try inventing a new word. Take inspiration from popular websites with invented names: Zappos, Trello, Zillow, Linode, Twillo, etc. You can use a domain name generator to come up with ideas.
Use an extension other than .com. If the domain name you want is already registered, you could consider using something other than the
.comextension. For example, ifmywebsite.comis already registered, you could buymywebsite.org.Custom top-level domains (TLDs) are a newer invention. These include industry-specific options like
.photographyfor photography websites,.techfor technology companies, and.shopfor e-commerce sites. The fees for custom TLDs are typically higher. Still, they can provide a unique and relevant domain extension that aligns with your website’s focus or industry, especially if the.comis already taken.You could also consider using a country code top-level domain (ccTLD). Popular options include Columbia’s
.co, Libya’s.ly, British Indian Ocean Territory’s.io, and Tuvalu’s.tvextension. Unsurprisingly, Anguilla’s.aiextension is also popular. ccTLDs can be a great option if you’re operating internationally, but they also come with risks. Some ccTLDs have content restrictions, higher renewal costs, or stability concerns due to political or infrastructure issues in their home countries.Purchase a premium domain name. Occasionally, you’ll discover that the name you want is registered but for sale by the owner. These premium domain names range in price from hundreds to millions of dollars. You can use dan.com and Sedo to search for premium domain names.
Don’t get discouraged if you have difficulty finding a domain name. Even professionals struggle with this part. Some people create a list of available domain names they like and then run them by their friends and family members. Usually, there’s at least one good domain name in your list that everybody can agree on.
💡 Tip: If you need help coming up with a great domain name, I heartily recommend two books. Hello, My Name Is Awesome: How to Create Brand Names That Stick is a fantastic introduction to this topic. And The 22 Immutable Laws of Branding is a personal favorite of mine that provides timeless advice on creating a memorable brand name.
For the example in this book, we’re going to use heroictiramisu.com. My kids were delighted to discover that the .com was available!
Buying the Domain Name
So you’ve found a domain name. Great! Now it’s time to buy it.
Let’s get something out of the way first. You can’t buy a domain name in the traditional sense of the word. You can only reserve a domain name by paying an annual fee. You’re effectively leasing the domain name for the duration of the reservation period.
If you stop paying the registration fee, the domain name expires and becomes available for anyone to register. I wanted you to know so you’re not surprised when you get next year’s registration fee notice!
We’ll use a registrar to purchase our domain name. There are thousands of registrars, but they’re not all created equal. Some registrars charge higher fees and engage in shady business practices.
Cloudflare Registrar is one registrar I feel comfortable recommending. Cloudflare doesn’t mark up the prices of domain names, so when you buy a domain name at Cloudflare, you’re buying it at cost. You won’t find a better deal anywhere else.
💡 Tip: I recommend Cloudflare Registrar for the rock-bottom prices and DNS service. But I’ve also heard good things about independent, reputable companies like Porkbun and DNSimple, and midsize companies like Namecheap. Feel free to use whatever registrar you want!
Let’s start by signing up for a Cloudflare account. It’s free and there’s no obligation.
After you’ve created your account, click the Domain Registration link on the sidebar, and then click the Register Domains link on the sidebar. Search for your domain name. If it’s available, click the Purchase link.
You’ll need to enter some personal information, like your name and address, as well as your payment information. Click the Complete Purchase button to purchase the domain name. If all goes well, you’ll own the domain name!
Now it’s time to connect your domain name to your website.
Adding the Domain Name to Netlify
We need to tell Netlify about our domain name so we can connect it to our website.
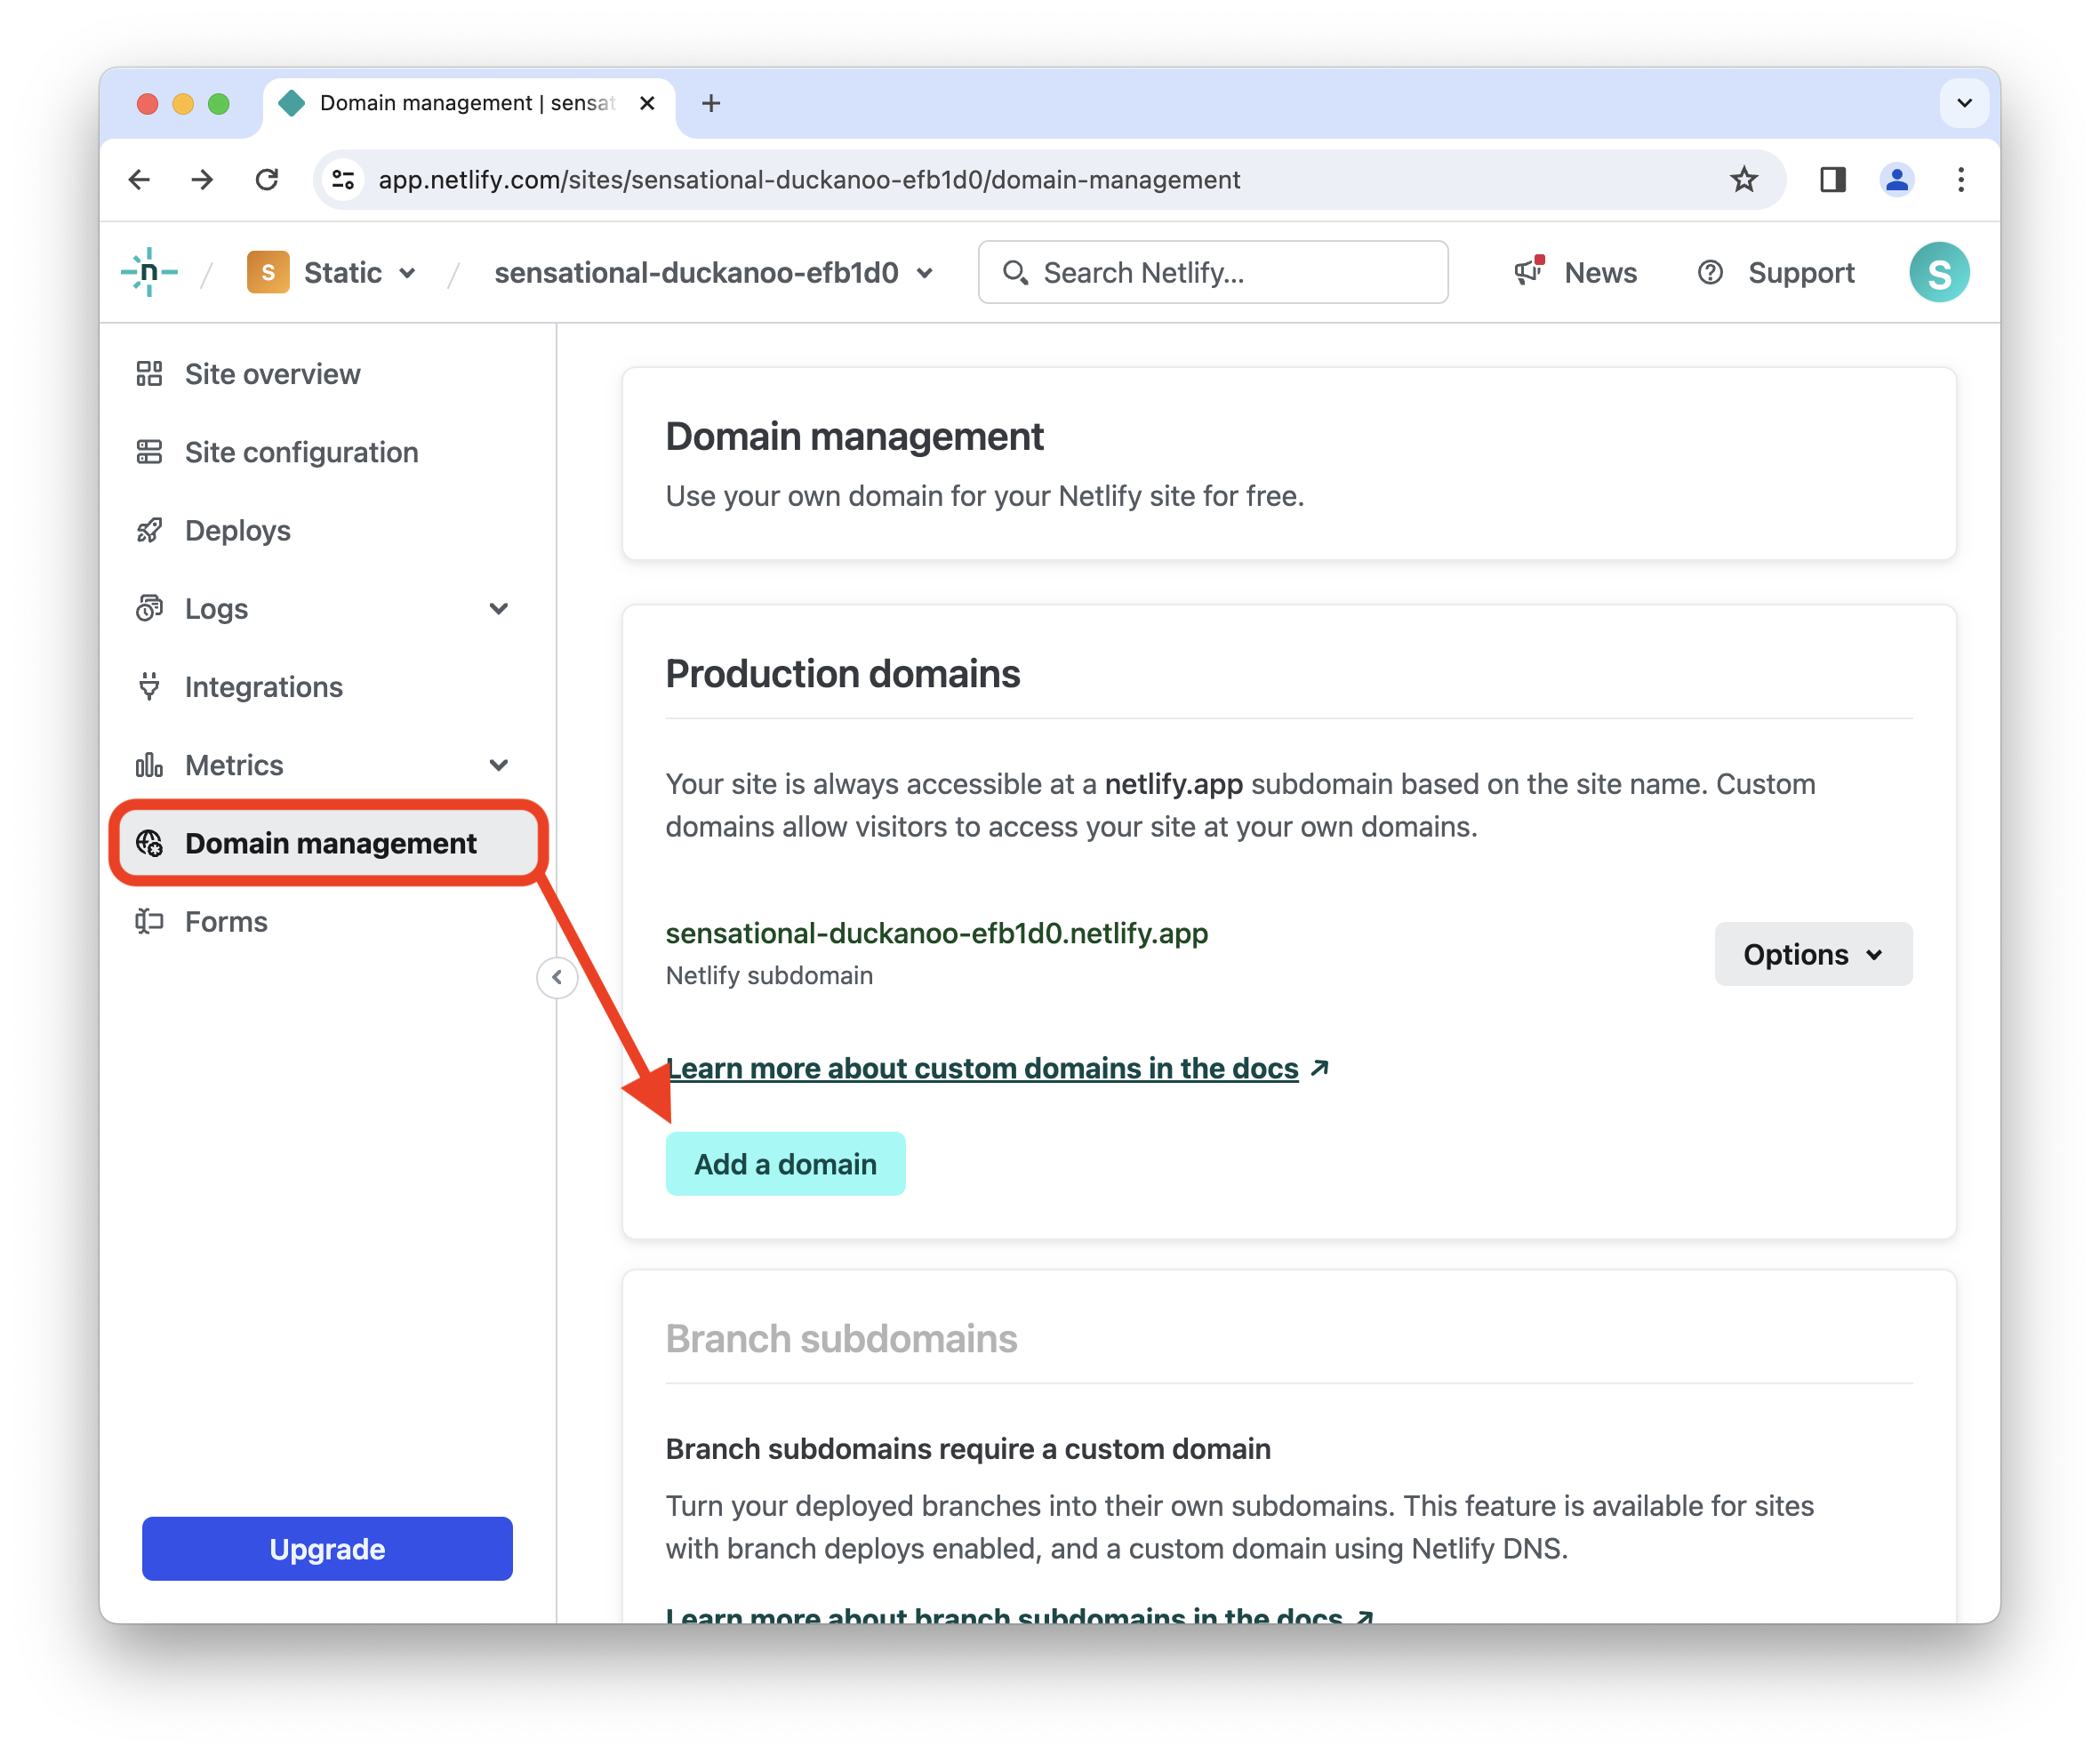
Log in to Netlify, then click the Domain management link. The domain settings are in the Production domains section, as shown below. Click the Add a button.
We’ll enter our domain name and then click the Verify button, as shown below.
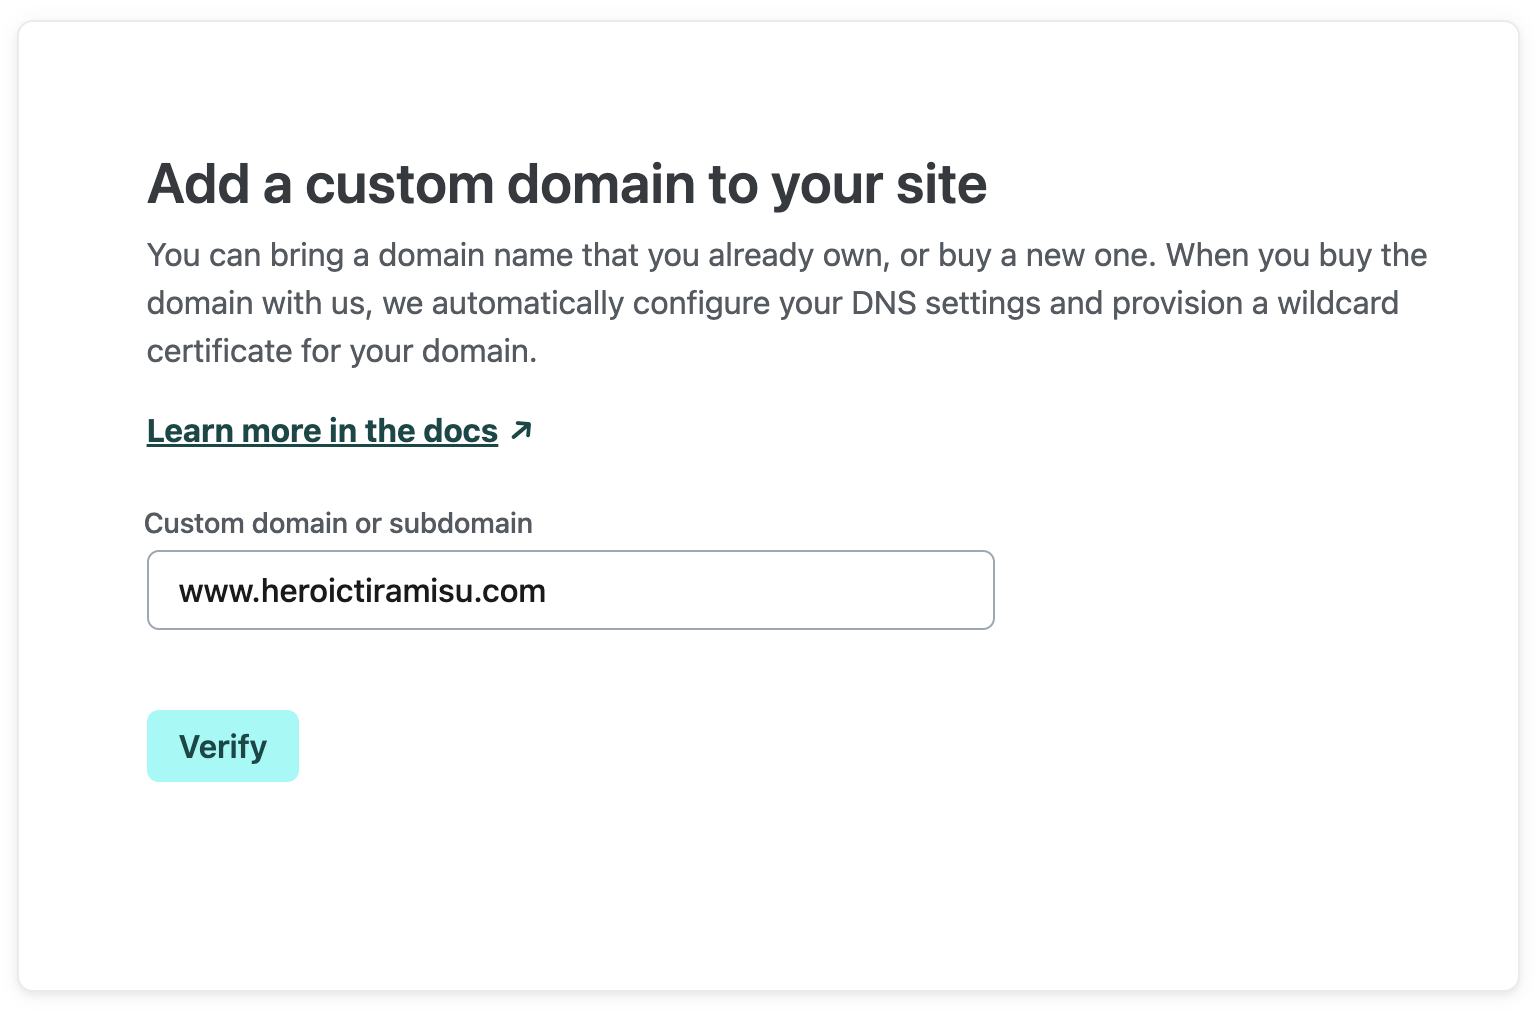
Netlify will check to see if the domain name is already registered (it is), and then we’ll click the Add domain button. At this point, we’ve successfully added the domain name to Netlify, but we still have one more step to complete before our domain name is pointing to our website.
Creating DNS Records
DNS stands for Domain Name System. It’s a public, decentralized database that links domain names to IP addresses or hostnames. Think of DNS as the telephone book of the internet. With DNS, you can access a website by typing its domain name instead of a hard-to-remember IP address or hostname.
When you create a DNS record, you connect a domain name like heroictiramisu.com to the IP address or hostname of the web server or cloud computing environment that’s hosting the website. We need to create two DNS records for our domain—one for www.heroictiramisu.com and another for heroictiramisu.com (without the www).
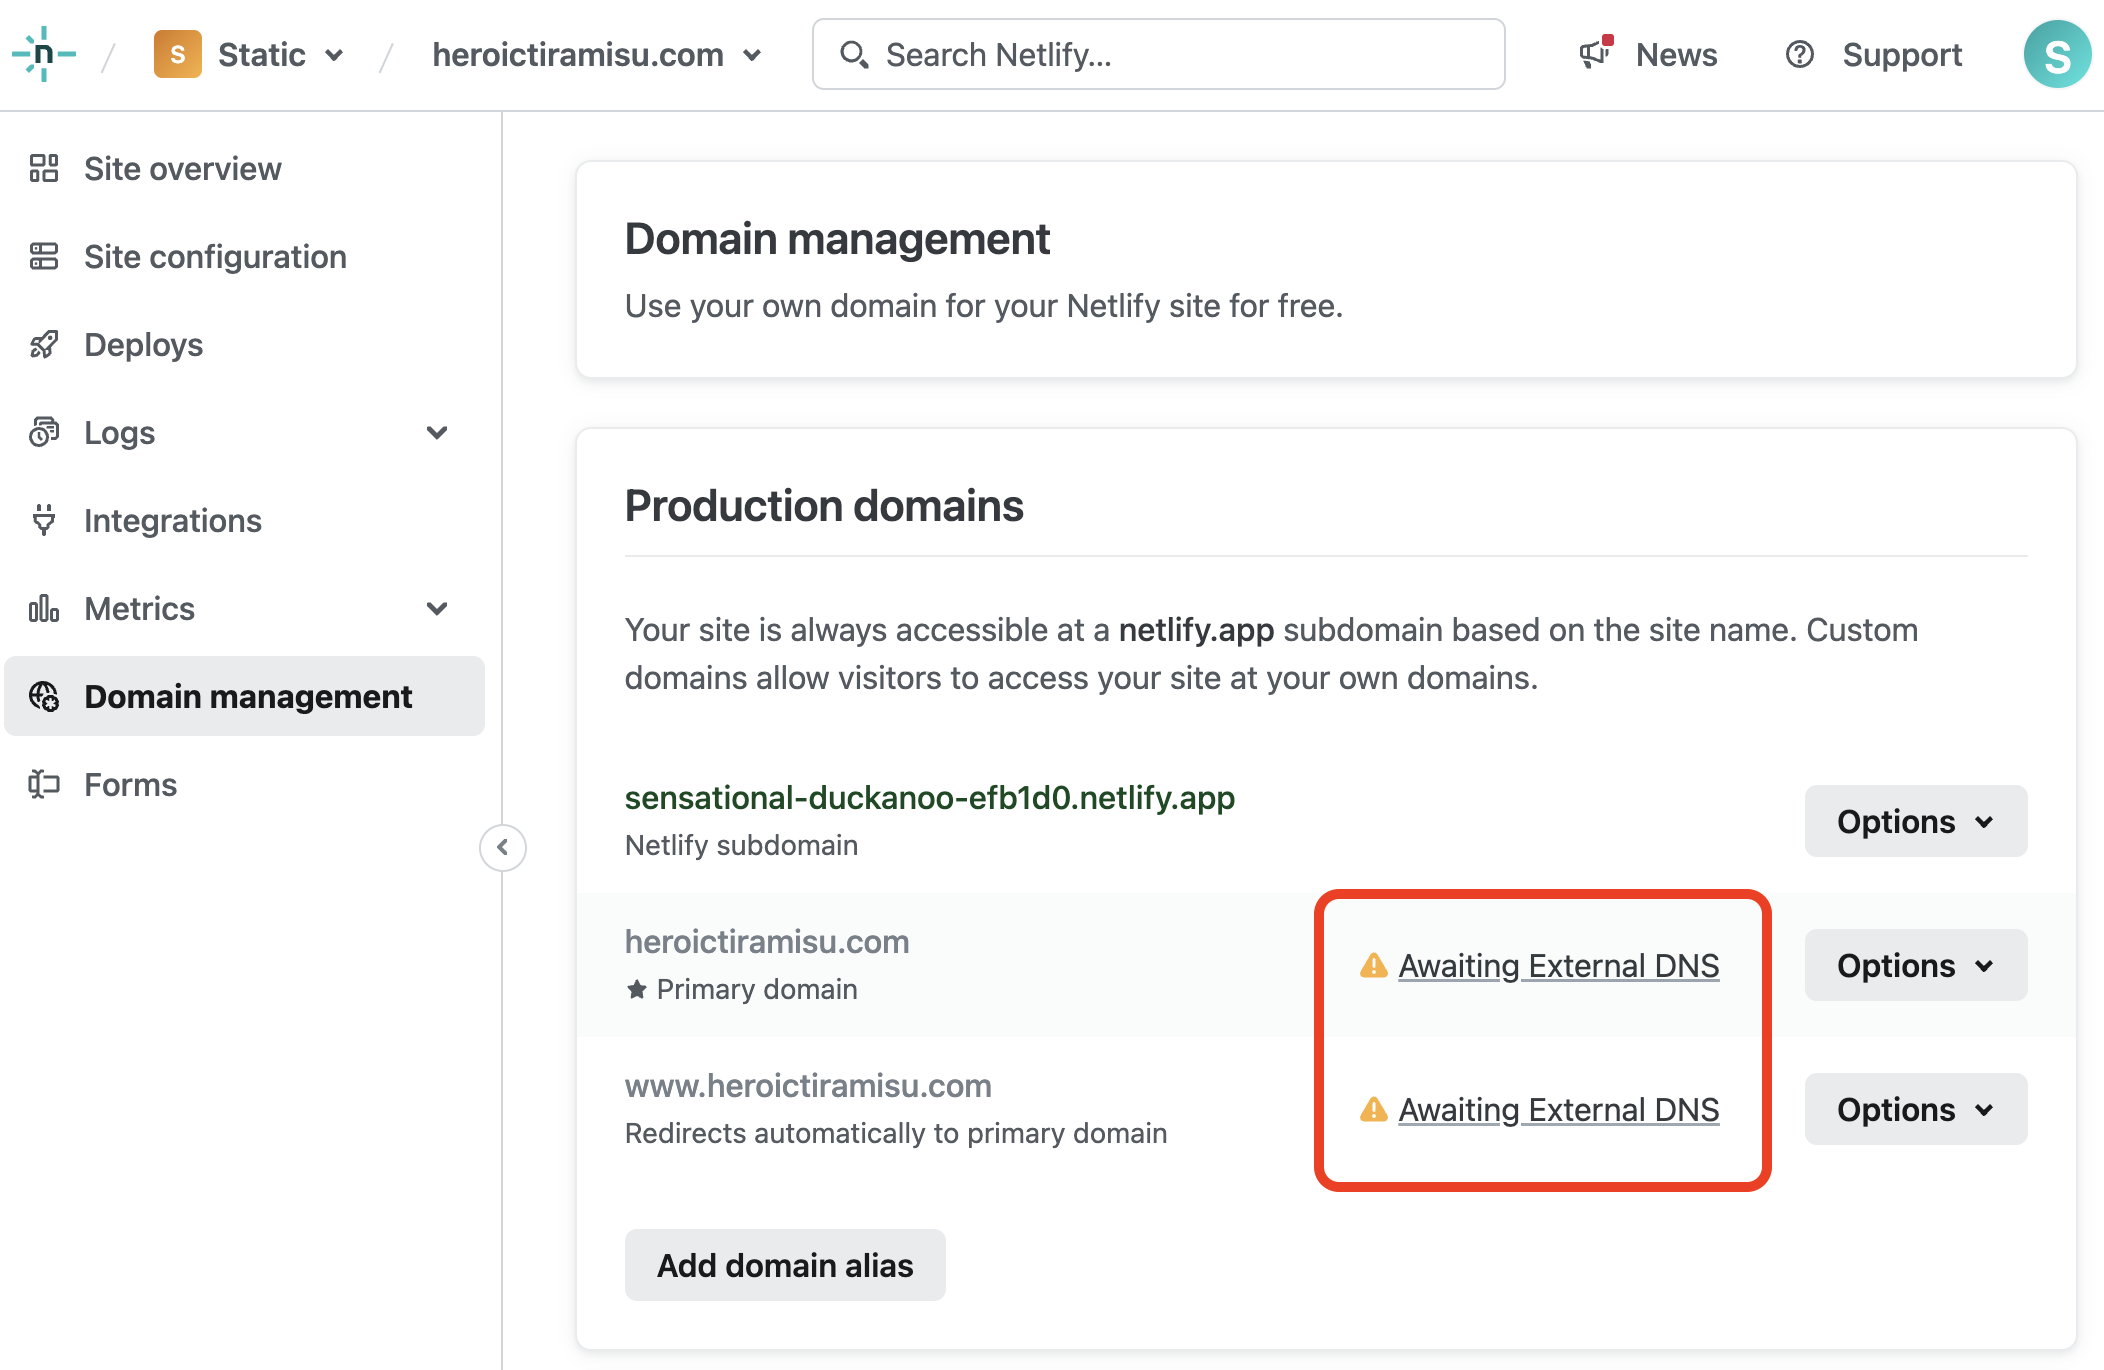
We’ll add the DNS records in the Cloudflare interface, but first, we need to get the target information for the DNS record from the Netlify interface. We can find it in the Netlify interface on Domain management page. There should be Awaiting External DNS links next to each domain name, as shown below.
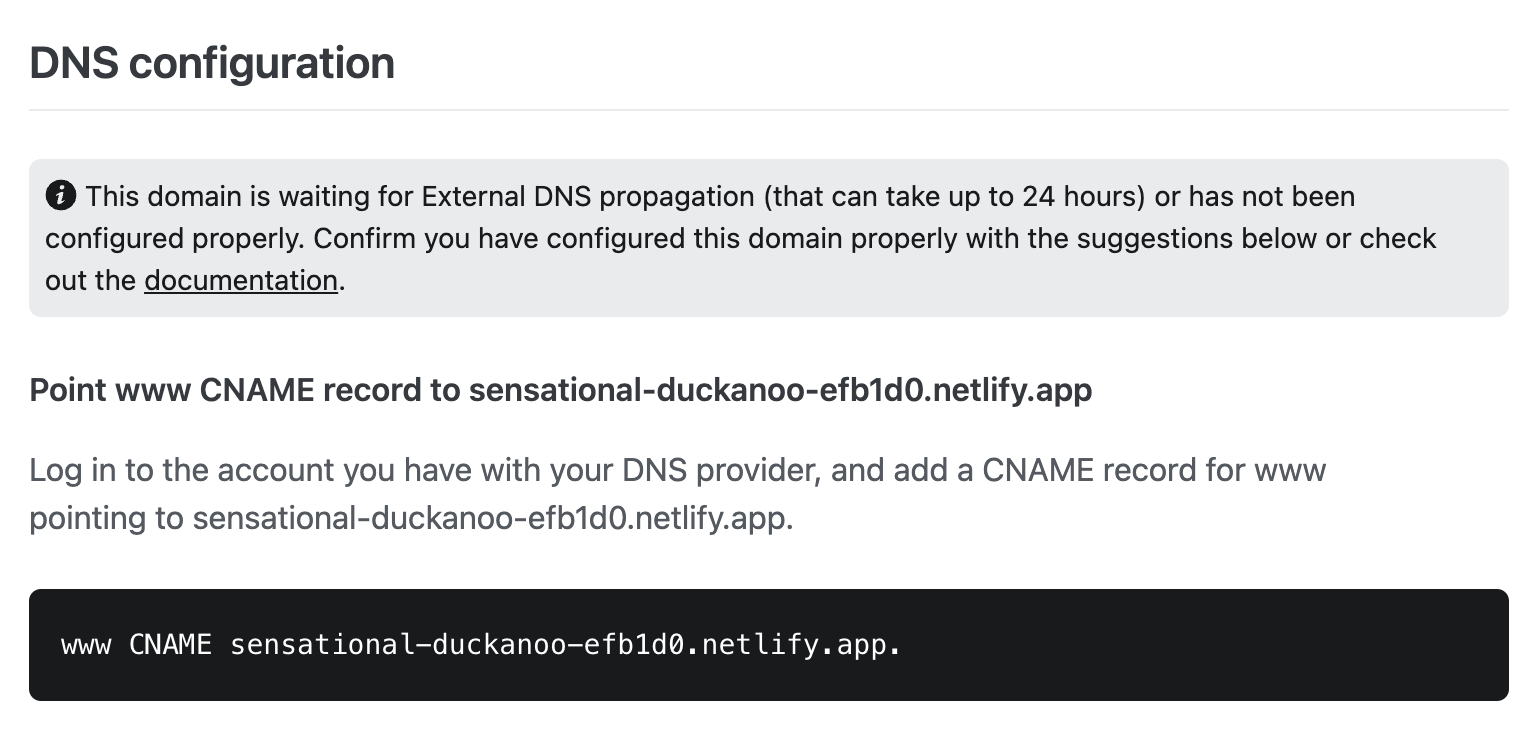
After you click a Awaiting External DNS link, you’ll see the window shown below. I clicked the link for www.heroictiramisu.com. The sensational-duckanoo-efb1d0.netlify.app bit is the target—that’s the information we need to create the DNS record in the Cloudflare interface.
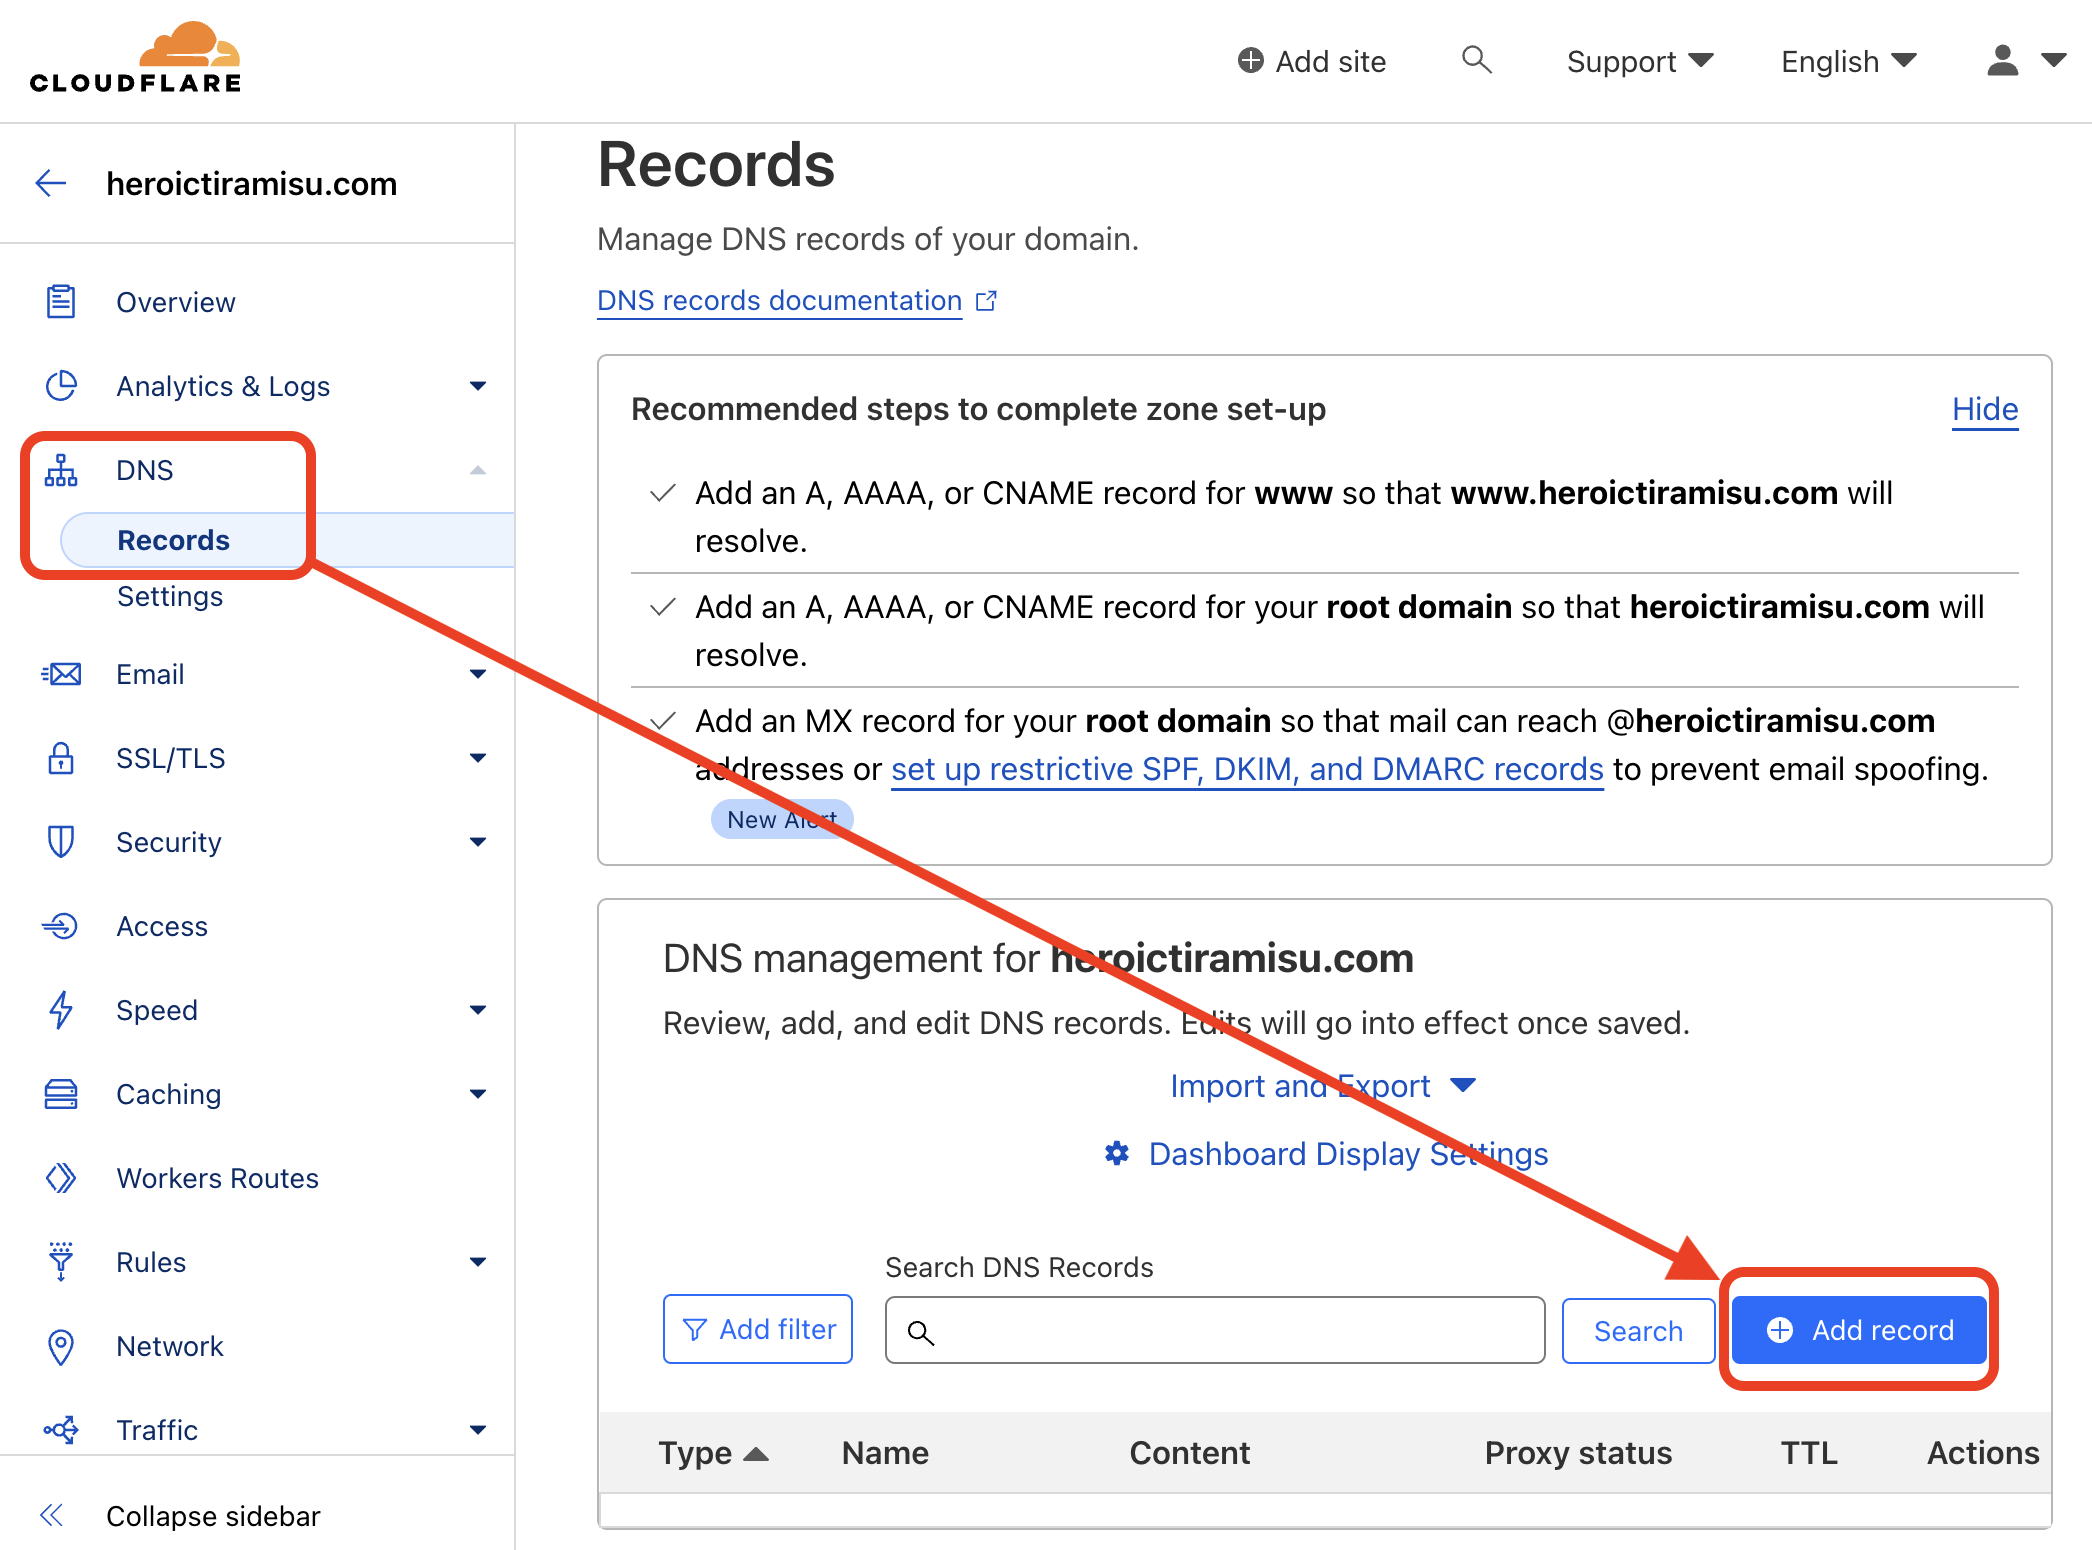
Now that we have the target information, we can create the DNS record. In the Cloudflare interface, we’ll click the DNS link on the sidebar, then click the Records link on the sidebar, and then click the Add record button, as shown below.
We’ll fill out the fields for the DNS record as shown below.
The type of DNS record we’re adding is called a CNAME record, so select CNAME from the Type menu. Type www in the Name field, and enter whatever target you copied from the Netlify interface in the Target field (in this case, it’s sensational-duckanoo-efb1d0.netlify.app). Be sure to turn off the Proxy status setting so it’s set to DNS only.
💡 Tip: Leaving the Proxy status setting enabled can cause problems that are difficult to troubleshoot. When that setting is enabled, Cloudflare will cache our website. The problem is that Netlify already caches our website, so we’ll end up with two different cached versions of our website!

Click the Save button to save the DNS record.
Now you’ll need to repeat these steps to add another DNS record for the other domain name (heroictiramisu.com). Go back to the Netlify interface, copy the target for that domain name, and then create the DNS record in the Cloudflare interface. When you’re adding the record in Cloudflare, select CNAME from the Type menu, and enter @ in the Name menu.
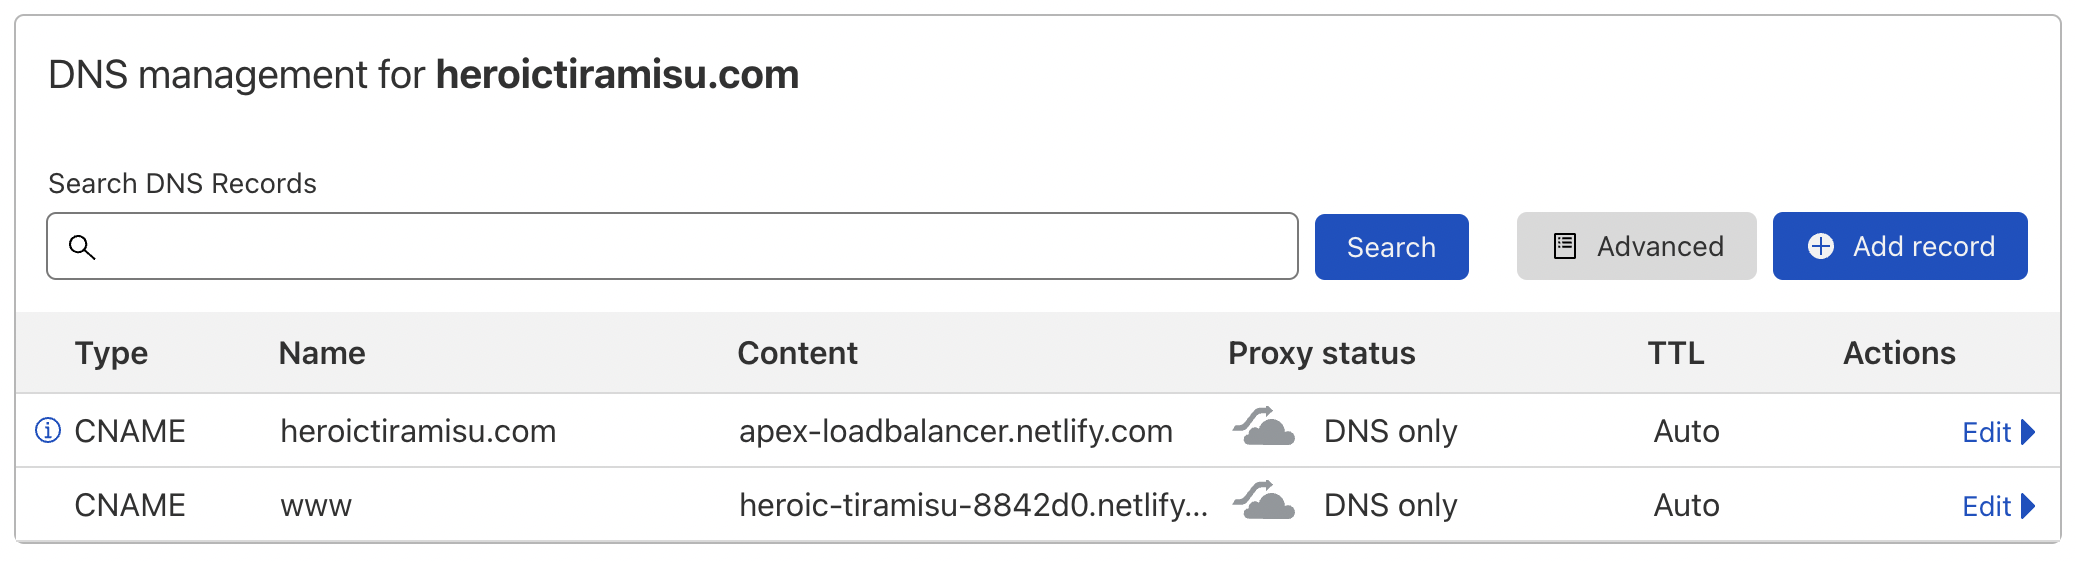
When you’re finished, you should have two DNS records in the Cloudflare interface, as shown below.
It takes time for DNS records to propagate throughout the DNS system. You won’t be able to access your website using your custom domain name until the DNS records have propagated. Usually this only takes a couple of minutes, but sometimes it can take hours or even days.
This is a good opportunity to get up, stretch your legs, and get another cup of coffee. When you get back to your desk, reload the Domain management page in the Netlify interface. If everything is working, the Check DNS configuration links should have disappeared. (If you still see the Check DNS configuration links, you’ll need to keep waiting.)
Now comes the moment of truth. Type http://www.heroictiramisu.com (or whatever domain you chose for yourself) in your web browser’s address bar and see if it loads. It works!
💡 Tip: If you’re interested in learning more about how DNS works, or if you need a refresher, I recommend reading How the Internet Really Works. It’s an illustrated book about networks, protocols, and general internet topics.
Enabling TLS
Our DNS records are working and our website is available on our domain name, but it’s currently only accessible from http:// and not https://. That’s a problem because it means that anyone who accesses our website is doing so over an unencrypted connection.
This might seem like a minor inconvenience, but leaving things this way could lead to major headaches down the road. Search engines and web browsers punish websites that don’t use encryption. This could adversely affect how our website is listed in search results, and visitors to our website will see a warning icon in their web browser’s address bar.
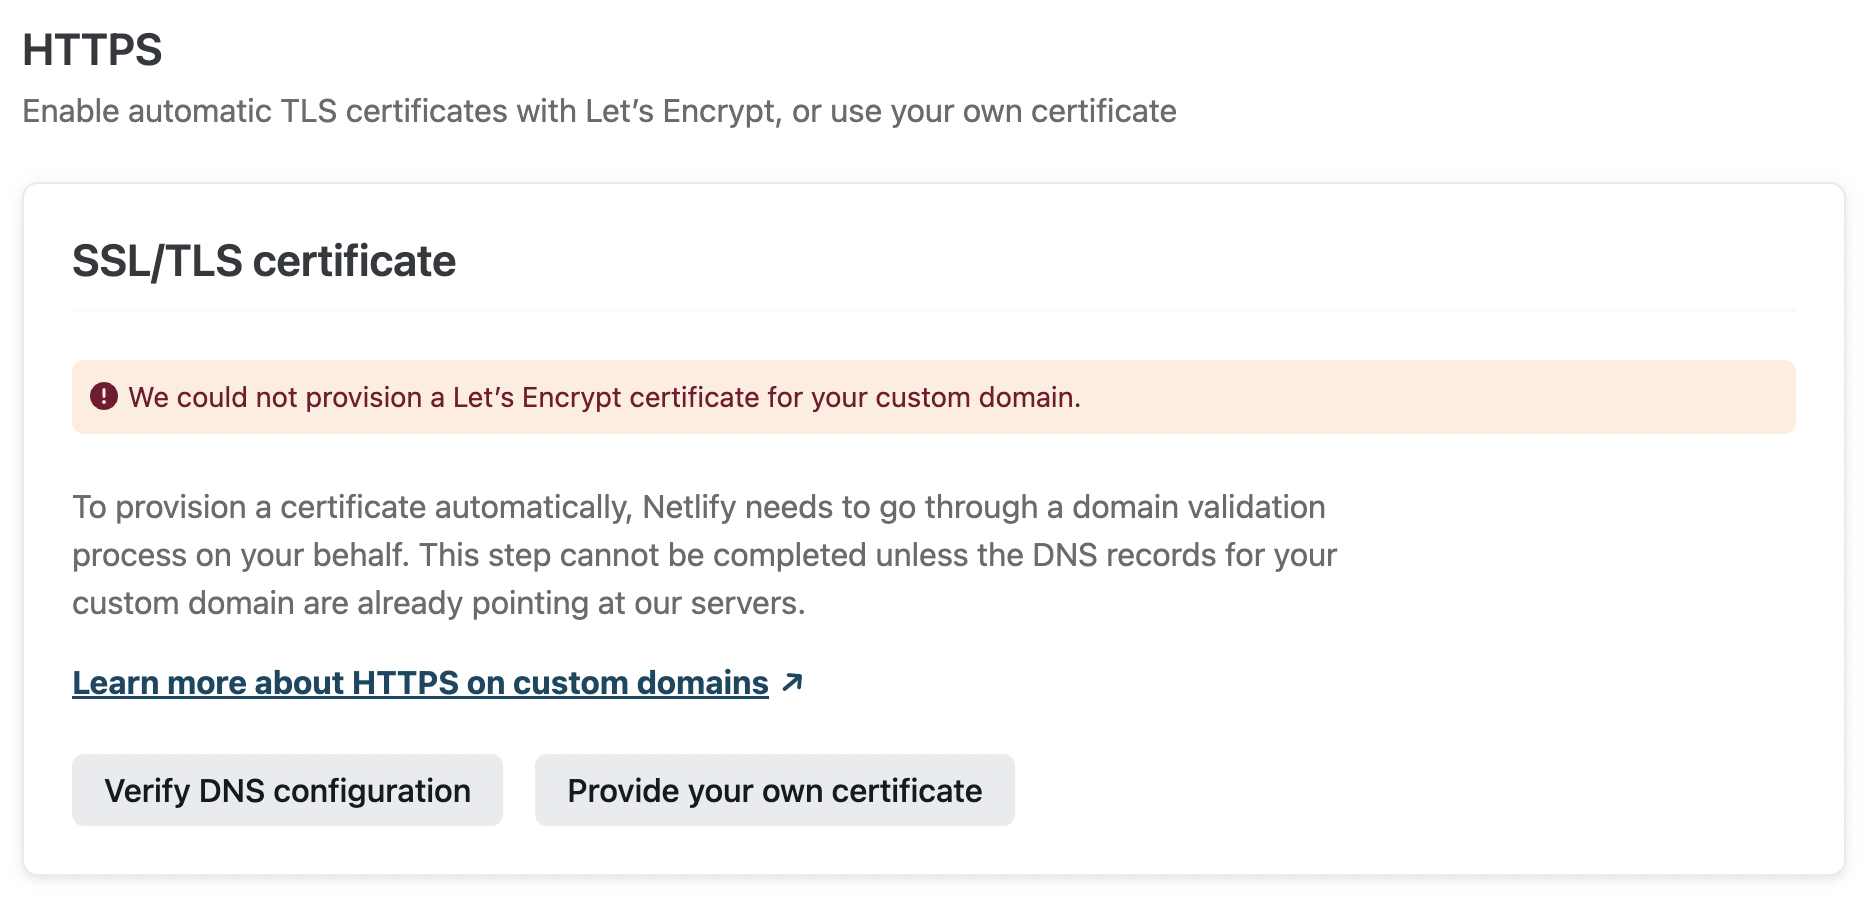
To encrypt the connection to our website, we need to provision a TLS certificate for our domain name. We can do this in the Netlify interface at the bottom of the Domain management page. First, we’ll click the Verify DNS configuration button, as shown below.
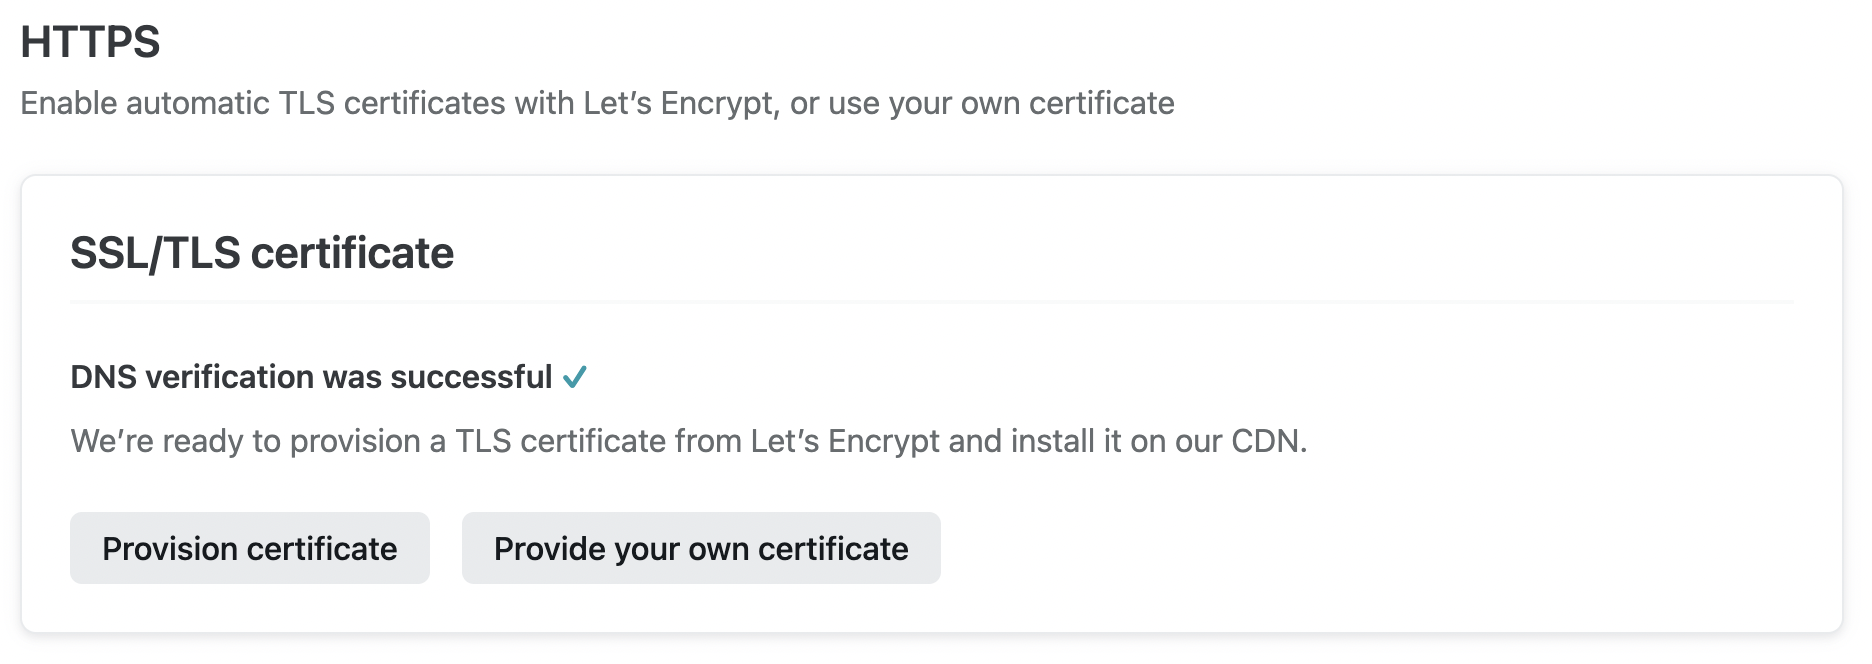
Netlify will verify your DNS records for your domain. If the verification process is successful, you’ll see the screen shown below. Click Provision certificate button to create a free TLS certificate for your domain name.
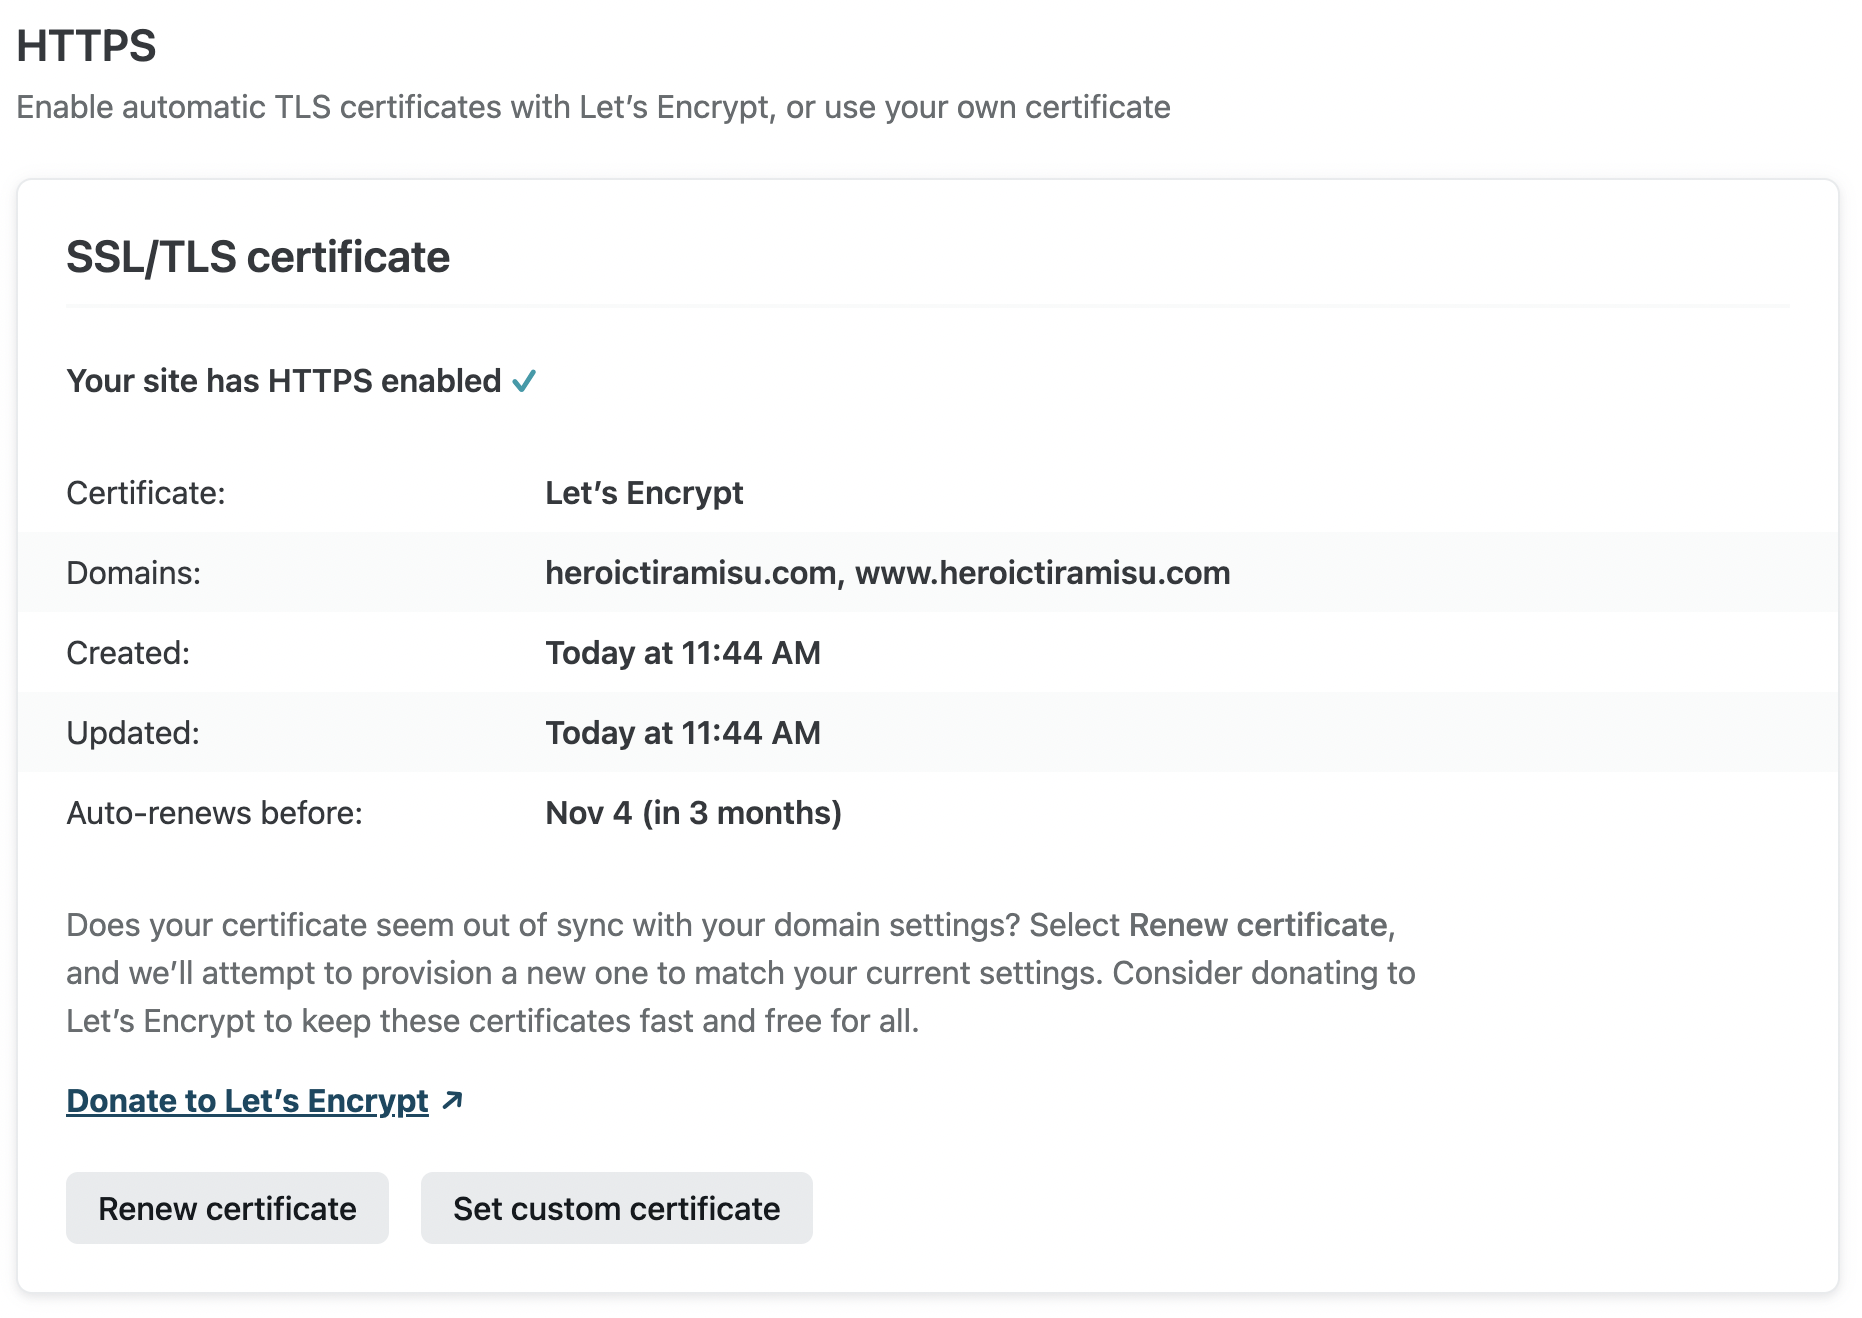
It may take a couple of minutes for Netlify and Let’s Encrypt—the certificate authority—to create the TLS certificate for your domain. If it doesn’t appear to be working, be patient and give it some time. Once the certificate has been provisioned and installed, the certificate information will appear at the bottom of the Domain management page, as shown below.
Don’t take Netlify’s word for it, though—try it in your web browser. Does the website load without any warnings or errors? Do you see the lock icon in your web browser’s address bar, as shown below?
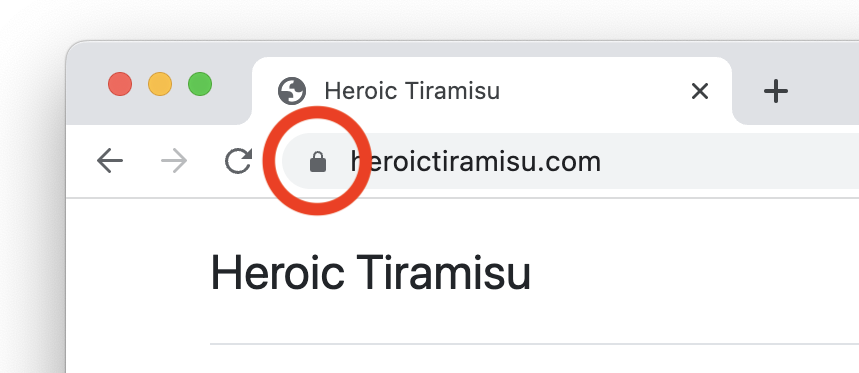
If so, you’ve successfully provisioned and installed the TLS certificate. Now people can access your website over an encrypted connection.