The Static Site Guide • Chapter 4
Creating a Static Website Using Hugo
Before moving on, let’s review what we’ve accomplished so far. We built a small but functional website using HTML and CSS, and we uploaded that website to Netlify. We also learned how to make updates to our website. Hopefully you’ve gotten a taste of what’s possible by using HTML, CSS, and inexpensive web hosting.
Practically speaking, there’s no reason why you couldn’t stop now. You could continue adding pages to your existing site and drag and drop everything onto Netlify to update your website as you make changes. If this works for you, by all means, continue revising the HTML and CSS and keep adding pages to build out your website.
But there are some potential problems with continuing to do things this way. The entire process, from updating to uploading our website, is fragile. It’d be hard to scale this website to thousands of pages. Editing HTML by hand is a tedious and error-prone task, and we’re missing out on better ways of creating content—like using Markdown, for example.
Content duplication is another problem. For example, if we wanted to update the top navigation bar of our website, we might need to update the code for every individual page, since each HTML document includes the code for the navigation elements. We can do better.
The website we built in the previous section was a good example, but it’s time to set it aside. In this section, we’ll use a static site generator to create a personal blog using a pre-made theme.
💡 Tip: You can find the source code for the website we’re about to create in the GitHub repository.
What’s a Static Site Generator?
A static site generator is a small command line application that takes various HTML, CSS, Markdown, and image files and builds a complete website. Static site generators strike a good balance between content management systems like WordPress and basic HTML websites like the one we just created.
Static site generators provide a variety of quality-of-life improvements compared to creating websites from scratch. For example, they allow you to create layouts that can be applied to all pages on your website, solving the pesky content duplication issue. They also allow you to write content using Markdown, style your website using pre-built themes, and add custom elements in the form of plugins and extensions. And they automatically handle housekeeping tasks, like creating sitemap.xml and robots.txt files for search engines.
Static site generators do this while eliminating virtually all of the complexity of content management systems. You don’t need to install a database or maintain a server. You just run a command on your computer to initiate the static site generator and it’ll build your website. You’ll have a fully-built website that you can upload to Netlify.
There are many static site generators available, all of which have unique strengths and weaknesses. You can find a list of static site generators on the Jamstack website. Static site generators are open-source software, so they’re free to use and modify.
We’ll use Hugo. Hugo is fast, reliable, and contains one of the best feature sets for most static websites. It also has a welcoming community and great existing themes for a wide variety of uses.
Setting up a Terminal Application
We’ll use a terminal application to install and interact with Hugo. A terminal application provides access to a command line interface that allows you to interact with your computer by typing commands. The exact appearance of your terminal depends on your operating system, but the following screenshot will give you a rough idea.
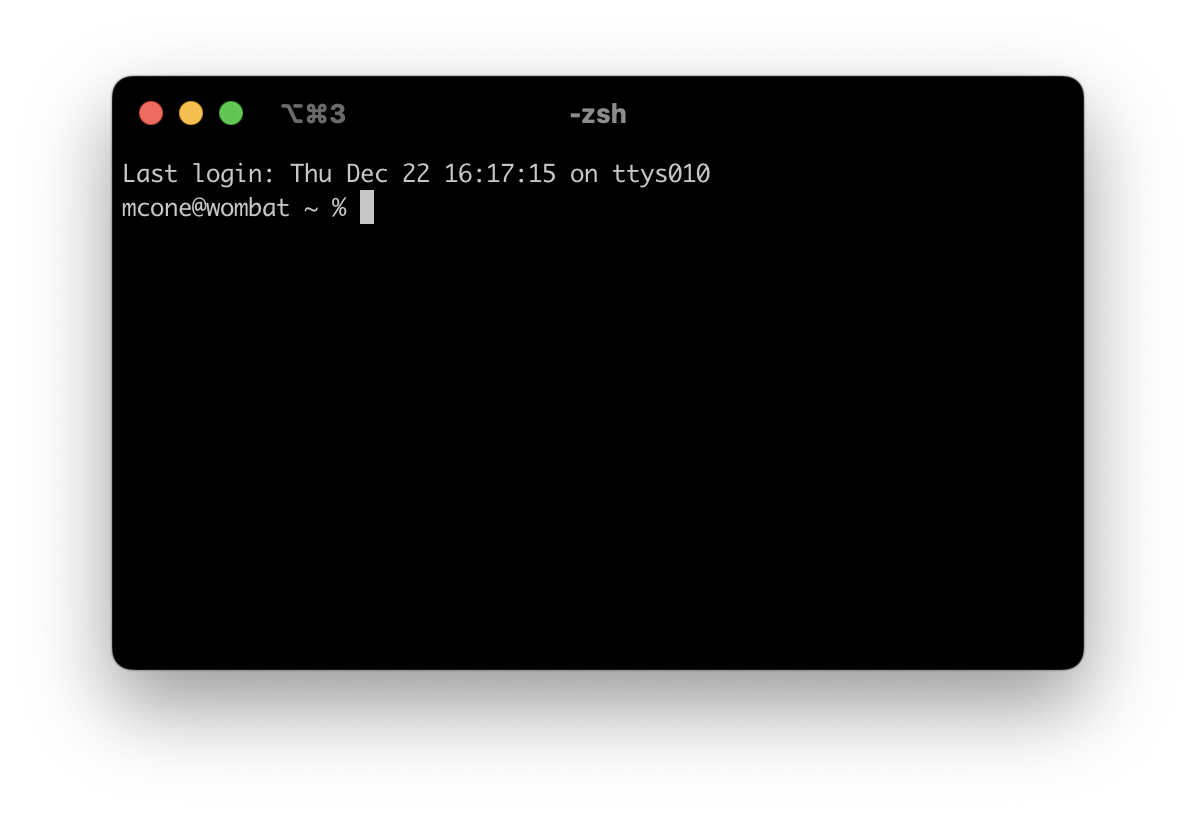
Most operating systems come with a terminal application. For example, on macOS the terminal application is (conveniently) called Terminal. Windows users can use a similar application called PowerShell.
Find the terminal application on your computer and open it now.
The command line can look intimidating if you’ve never used it before. Don’t worry—this isn’t too complicated. The general idea is that you enter a command in your terminal application and press the Return key on your keyboard to execute the command. For example, if you wanted to see which user you’re currently logged in as, you could type whoami and press the Return key. You’d see your username printed on the next line.
I’ll provide you with the commands to use, and then you’ll copy and paste them into your terminal application. Later, after you’ve gotten comfortable with the command line, you’ll start entering commands on your own. Eventually, using the command line will become second nature.
Installing Hugo
Let’s use the terminal application to install Hugo on our computer. The exact procedure depends on the operating system you’re using:
- Mac users can follow the instructions below.
- Windows users can skip ahead to Using Winget to Install Hugo.
- If you’re using something besides macOS or Windows, refer to the installation instructions on the Hugo website.
Installing Homebrew (macOS)
We’ll start by installing the Homebrew package manager. This is a pre-step of sorts. Homebrew is a small application that will allow us to install and manage Hugo. Enter the following command to install Homebrew:
/bin/bash -c "$(curl -fsSL https://raw.githubusercontent.com/Homebrew/install/HEAD/install.sh)"
Follow the prompts in your terminal application. You’ll be prompted to enter your password and then press the Return key to start the installation. The entire output is displayed below:
mcone@wombat ~ % /bin/bash -c "$(curl -fsSL https://raw.githubusercontent.com/Homebrew/install/HEAD/install.sh)"
==> Checking for `sudo` access (which may request your password)...
Password:
==> This script will install:
/opt/homebrew/bin/brew
/opt/homebrew/share/doc/homebrew
/opt/homebrew/share/man/man1/brew.1
/opt/homebrew/share/zsh/site-functions/_brew
/opt/homebrew/etc/bash_completion.d/brew
/opt/homebrew

Press RETURN/ENTER to continue or any other key to abort:
==> /usr/bin/sudo /usr/sbin/chown -R mcone:admin /opt/homebrew
==> Downloading and installing Homebrew...
remote: Enumerating objects: 307, done.
remote: Counting objects: 100% (258/258), done.
remote: Compressing objects: 100% (111/111), done.
remote: Total 307 (delta 178), reused 209 (delta 134), pack-reused 49
Receiving objects: 100% (307/307), 169.94 KiB | 3.95 MiB/s, done.
Resolving deltas: 100% (186/186), completed with 55 local objects.
From https://github.com/Homebrew/brew
 * [new branch]          dependabot/bundler/Library/Homebrew/rubocop-performance-1.15.2 -> origin/dependabot/bundler/Library/Homebrew/rubocop-performance-1.15.2
 * [new branch]          less-agressive-core-tap -> origin/less-agressive-core-tap
   895d32212..ba8e40f24  master                  -> origin/master
 * [new branch]          setup-homebrew-test     -> origin/setup-homebrew-test
HEAD is now at ba8e40f24 Merge pull request #14286 from Homebrew/dependabot/bundler/Library/Homebrew/rubocop-1.41.1
Updated 1 tap (homebrew/core).
==> Installation successful!

==> Homebrew has enabled anonymous aggregate formulae and cask analytics.
Read the analytics documentation (and how to opt-out) here:
  https://docs.brew.sh/Analytics
No analytics data has been sent yet (nor will any be during this install run).

==> Homebrew is run entirely by unpaid volunteers. Please consider donating:
  https://github.com/Homebrew/brew#donations

==> Next steps:
- Run brew help to get started
- Further documentation:
    https://docs.brew.sh
Homebrew should be installed now. You can check by entering the following command:
brew --version
If everything worked, the following output will be displayed:
mcone@wombat ~ % brew --version
Homebrew 4.2.19
💡 Tip: If Homebrew didn’t install correctly, try reading through the Homebrew documentation or posting a question in the discussion forum.
Using Homebrew to Install Hugo (macOS)
Now you can use Homebrew to install Hugo. Enter the following command to install Hugo:
brew install hugo
Hugo should be installed now. You can check by entering the following command:
hugo version
If everything worked, you should see something similar to this output:
mcone@wombat ~ % hugo version
hugo v0.128.0+extended darwin/arm64 BuildDate=2024-06-25T16:15:48Z VendorInfo=brew
You’ve successfully installed Hugo on your Mac and you’re ready to create a new website.
Using Winget to Install Hugo (Windows)
If you’re using Microsoft Windows, you can use winget command line tool. It’s a package manager for Windows that’s similar to Homebrew.
Start by opening PowerShell. You should see a command prompt. Enter the following command to install Hugo:
winget install hugo.hugo.extended
Hugo should be installed now. You can check by entering the following command:
hugo version
If everything worked, you should see something similar to this output:
PS C:\Users\mcone> hugo version
hugo v0.126.1-3d40aba512931031921463dafc172c0d124437b8+extended windows/amd64 BuildDate=2024-05-15T10:42:34Z VendorInfo=gohugoio
You’ve successfully installed Hugo on your PC and you’re ready to create a new website.
Creating the Hugo Website
Previously, we created our first website from scratch using nothing but HTML, CSS, and our ingenuity. This time, we’ll use Hugo to create a bare-bones website, and then we’ll install a pre-made theme for Hugo and modify it to suit our needs. We’ll do this by entering commands in our terminal application.
Before we start, you should know that Hugo will create a new directory for our website. It will do this in whatever folder we’re working in from the command line when we run the command. We can see what directory we’re working in by entering the pwd command, which is shorthand for “present working directory”:
pwd
You should see output similar to the following:
mcone@wombat ~ % pwd
/Users/mcone
Since I’m using macOS, I’ll change into a more standard and accessible directory: Documents. I’ll do this by entering the following command:
cd /Users/mcone/Documents
If I enter the pwd command again, I’ll see that I’m in the Documents directory:
mcone@wombat Documents % pwd
/Users/mcone/Documents
If you’re using Windows, you can use the pwd and cd commands in PowerShell. Your Documents folder will be in a different location, however.
Now we can make our new website. Enter the following command to create the new website:
hugo new site heroic-tiramisu
If everything works, you should see the following output:
mcone@wombat Documents % hugo new site heroic-tiramisu
Congratulations! Your new Hugo site is created in /Users/mcone/Documents/heroic-tiramisu.

Just a few more steps and you're ready to go:

1. Download a theme into the same-named folder.
   Choose a theme from https://themes.gohugo.io/ or
   create your own with the "hugo new theme <THEMENAME>" command.
2. Perhaps you want to add some content. You can add single files
   with "hugo new <SECTIONNAME>/<FILENAME>.<FORMAT>".
3. Start the built-in live server via "hugo server".

Visit https://gohugo.io/ for quickstart guide and full documentation.
Hugo created a new directory called heroic-tiramisu—along with some new files and folders inside that—in our Documents folder. We’ll take a look at the directory structure after we install the theme.
Using a Theme
A theme is a collection of HTML and CSS files that Hugo uses to style the website. Similar to how CSS helps separate the content from the presentation layer, the idea behind themes is that they’re isolated from our website’s content. If you get tired of one theme, you can usually switch to another theme without too much hassle. You could also create your own custom theme, perhaps by using Bootstrap—the CSS framework we discussed earlier—as a starting point.
The concept of themes isn’t exclusive to Hugo. Virtually every content management system and website building service provides themes that you can apply to your website. Most themes have been created by experienced web developers, so they already look professional.
You can change the way a theme looks by modifying the HTML and CSS yourself. Updating the look and feel of a pre-made theme is a lot easier than building your own theme from scratch. And let’s be honest. While some people enjoy designing and developing their website from the bottom up using HTML and CSS, the push-button simplicity of themes can be a welcome relief when all you want to do is get your website up and running as quickly as possible.
I’ll use the Terminal theme as an example. It’s a clean-looking theme for a personal blog. If you’d prefer to use a different theme for your website, have at it. You can find a complete list of all the available themes for Hugo at https://themes.gohugo.io/. Note that the installation and configuration instructions vary slightly from theme to theme.
💡 Tip: The Terminal theme is archived—the developer has stopped maintaining it. This theme won’t receive any new features or bug fixes. You might not want to use an archived theme for a production website, but it’ll work well for our purposes.
Installing the Theme
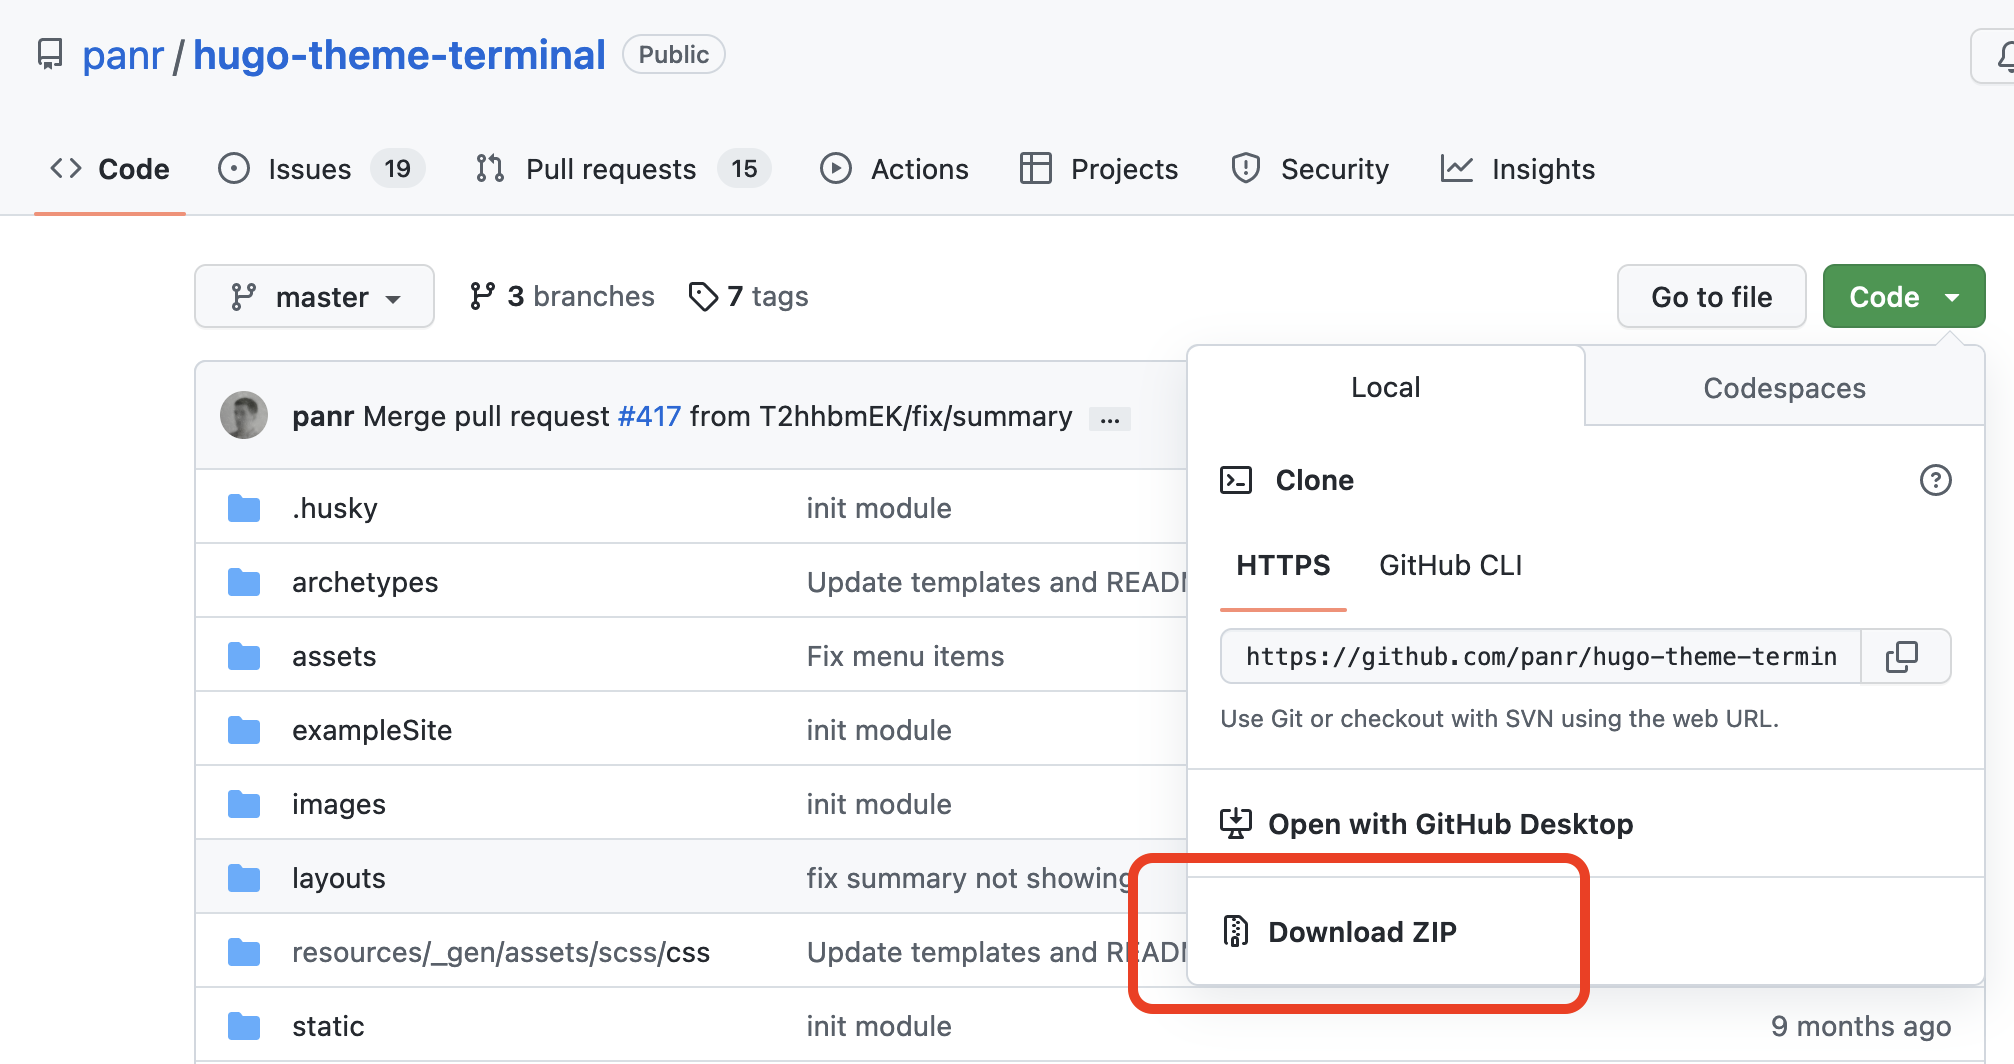
Let’s download and install the Terminal theme. The source code for the Terminal theme is stored on GitHub, a code-sharing website. Open https://github.com/panr/hugo-theme-terminal in your web browser, and then select Download ZIP from the Code menu, as shown below.
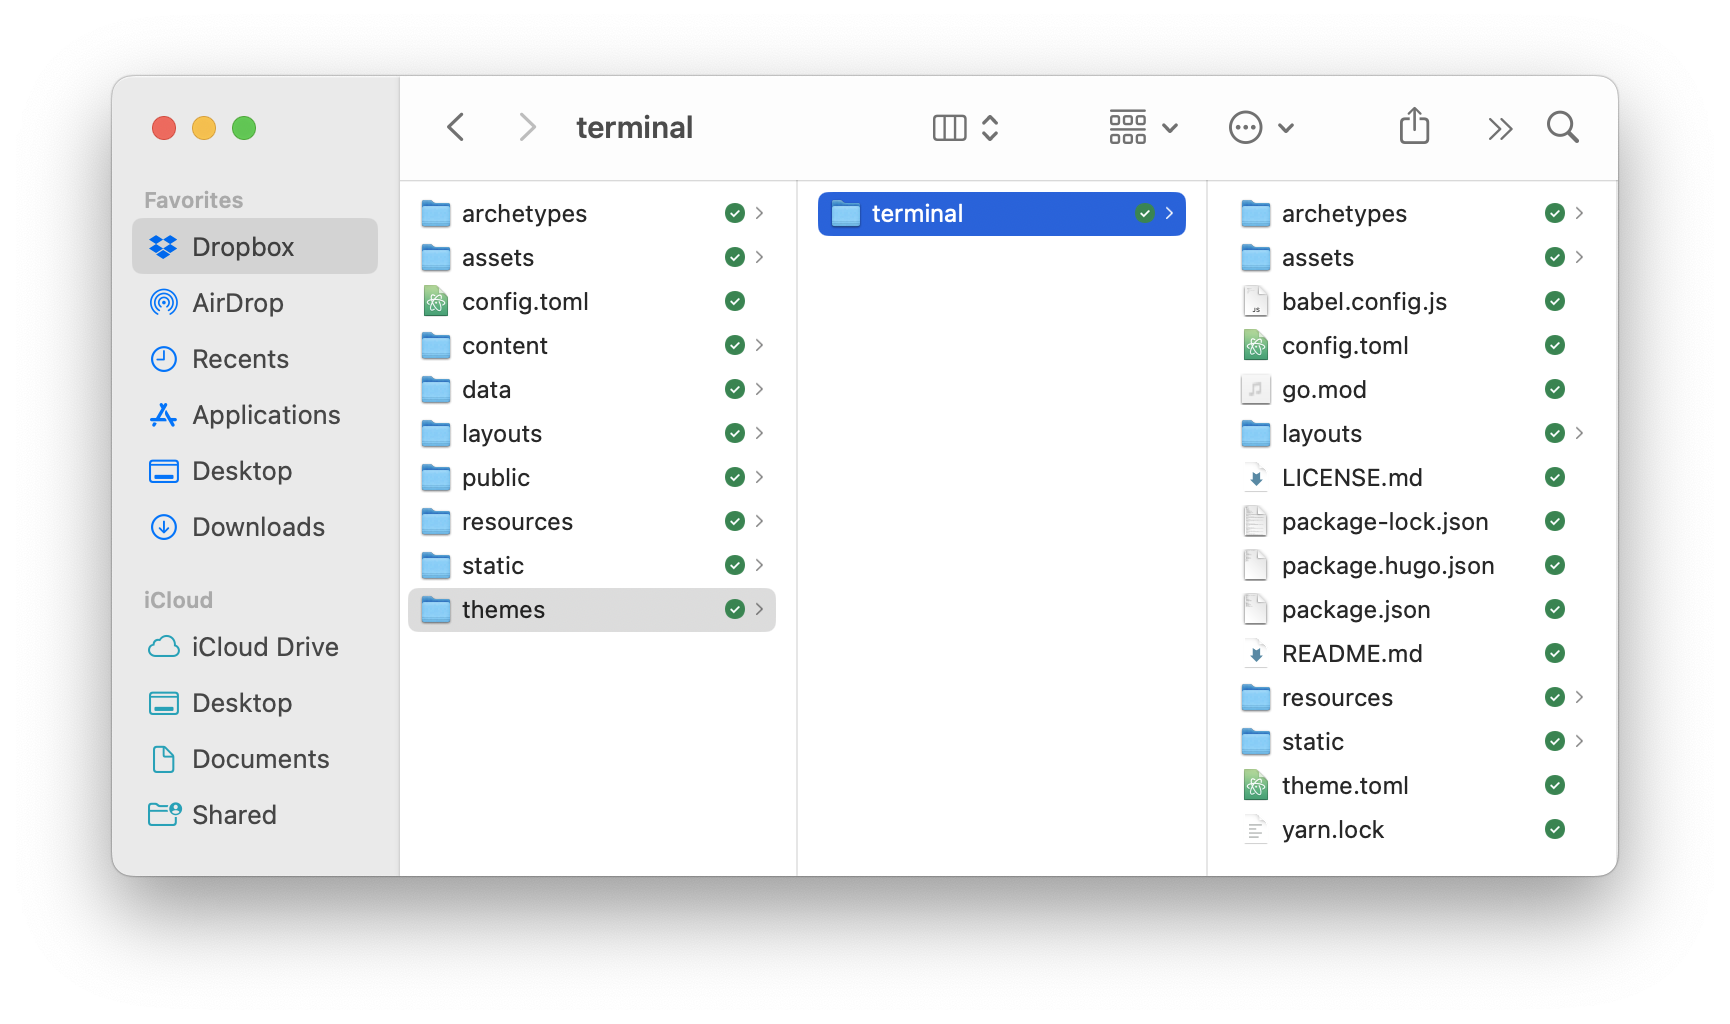
After the ZIP file downloads to your computer, unarchive it and move the hugo-theme-terminal-master folder to the heroic-tiramisu/themes directory. Rename the hugo-theme-terminal-master folder to terminal. Your directory structure should look roughly as follows.
Now that we’ve successfully installed our theme, we can start customizing it.
Configuring the Theme
We need to customize the config.toml file for the Terminal theme. The config.toml file holds metadata and settings for our Hugo website. Hugo uses these settings to control how the website is built, and our theme uses these settings to fill in variables in the template and change the appearance of our website.
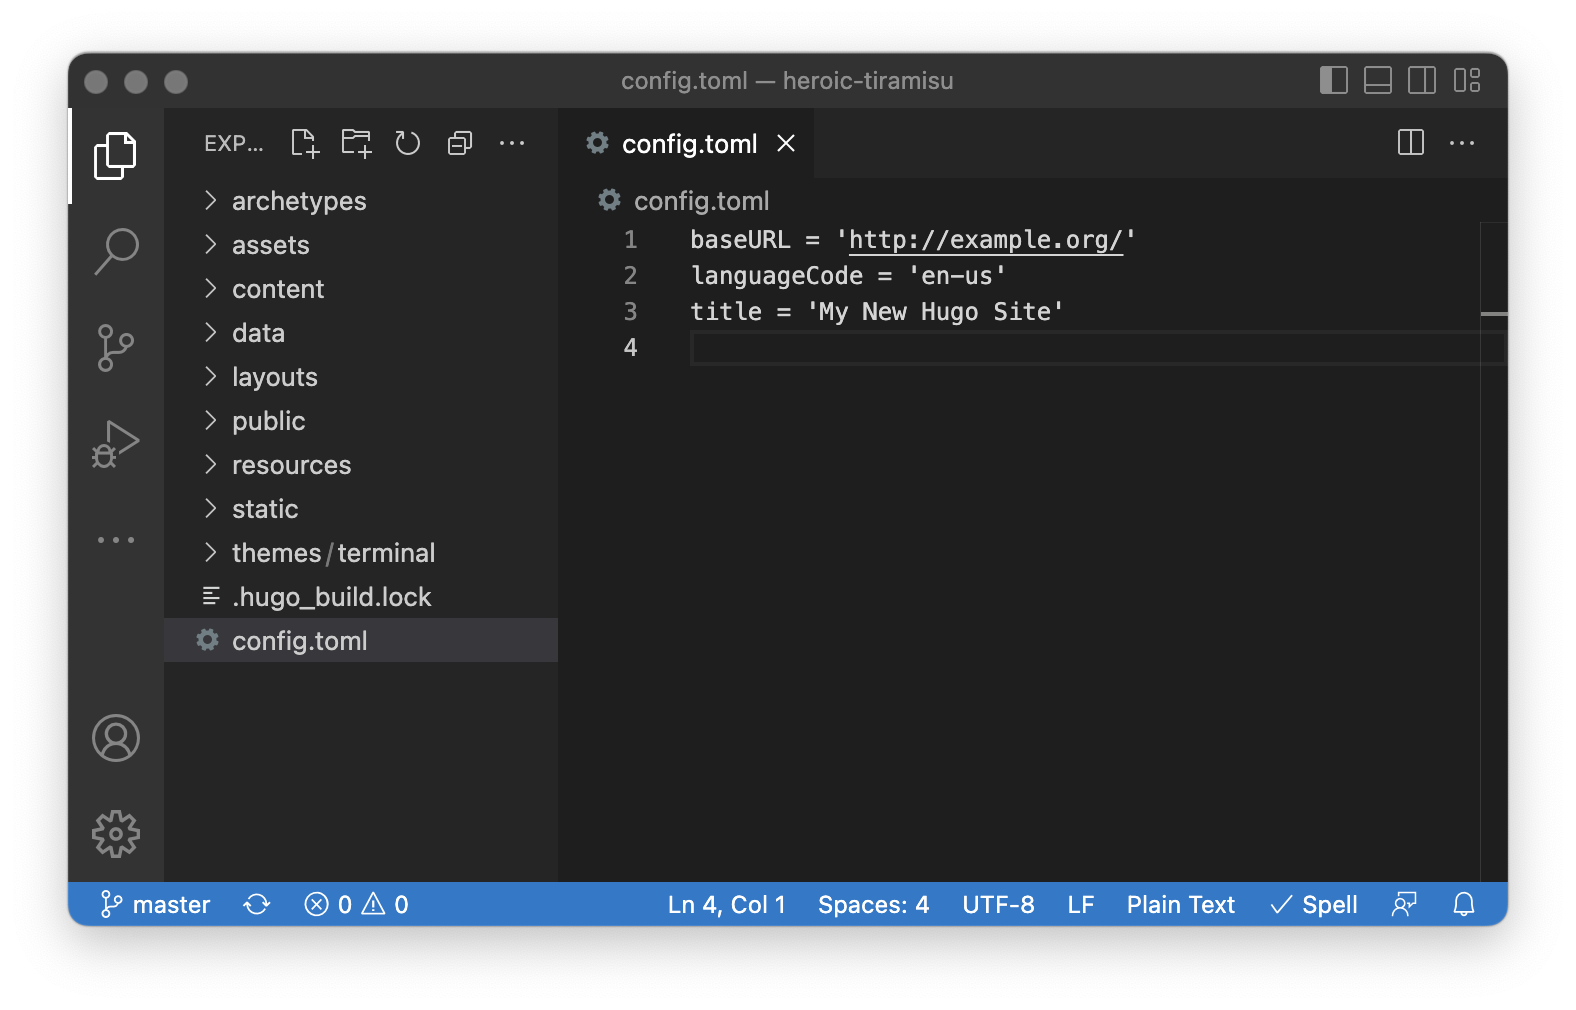
At this point, we’ll open the heroic-tiramisu directory in our text editor so that we can start editing files.
In VS Code, select New Window from the File menu, and then select Open Folder from the File menu. Browse to the the heroic-teiramisu directory, select it, and click Open. The directory will open in VS Code. Select the config.toml file in the sidebar to start editing it, as shown below.
The Terminal theme’s documentation provides a sample configuration file that you can use as a starting part. That file contains every possible setting for the Terminal theme, which is overkill for our needs. To simplify things, I’ve customized the defaults and provided them below so that you can copy and paste them into your config.toml file.
💡 Tip: The Hugo configuration file is written in TOML, a file format for configuration files. That’s why the file has the
.tomlfile extension and the odd formatting of the settings below.
baseURL = "/"
languageCode = "en-us"
theme = "terminal"
paginate = 5

[params]
  contentTypeName = "posts"
  themeColor = "orange"
  showMenuItems = 1
  fullWidthTheme = false
  centerTheme = true

[languages]
  [languages.en.params]
    languageName = "English"
    title = "Heroic Tiramisu"
    subtitle = "A delicious blog"
    owner = "Heroic Tiramisu"
    keywords = ""
    copyright = "© 2024 Heroic Tiramisu"
    menuMore = "Show more"
    readMore = "Read more"
    readOtherPosts = "Read other posts"
    newerPosts = "Newer posts"
    olderPosts = "Older posts"
    missingContentMessage = "Page not found..."
    missingBackButtonLabel = "Back to home page"

    [languages.en.params.logo]
      logoText = "Heroic Tiramisu"
      logoHomeLink = "/"
Save the changes to the config.toml file. We’ve finished installing and configuring the theme. Now we can see what it looks like!
Previewing the Website
We haven’t created any content for our Hugo website yet, but since we already have a skeleton website and a theme, we can still preview it. We can do this by using the small web server that comes with Hugo. After we start the server, we can open our website in our web browser—it will only be visible to us.
To start Hugo’s web server, switch to your terminal application. Make sure you’re still in the heroic-tiramisu directory (when in doubt, use the pwd command to check which directory you’re in), and then enter the following command:
hugo serve
If everything works, and the server starts, we’ll see the following output:
mcone@wombat heroic-tiramisu % hugo serve
Watching for changes in /Users/mcone/Library/CloudStorage/Dropbox/Static Guide/heroic-tiramisu/{archetypes,assets,content,data,layouts,static,themes}
Watching for config changes in /Users/mcone/Library/CloudStorage/Dropbox/Static Guide/heroic-tiramisu/config.toml, /Users/mcone/Library/CloudStorage/Dropbox/Static Guide/heroic-tiramisu/themes/terminal/config.toml
Start building sites …
hugo v0.128.0+extended darwin/arm64 BuildDate=2024-06-25T16:15:48Z VendorInfo=brew

                   | EN
-------------------+-----
  Pages            | 14
  Paginator pages  |  0
  Non-page files   |  0
  Static files     | 10
  Processed images |  0
  Aliases          |  2
  Cleaned          |  0

Built in 85 ms
Environment: "development"
Serving pages from disk
Running in Fast Render Mode. For full rebuilds on change: hugo server --disableFastRender
Web Server is available at http://localhost:1313/ (bind address 127.0.0.1)
Press Ctrl+C to stop
Now we can open the website in our web browser. See the URL in the output above? We’ll copy and paste that—http://localhost:1313/—into our web browser to open the website, as shown below.
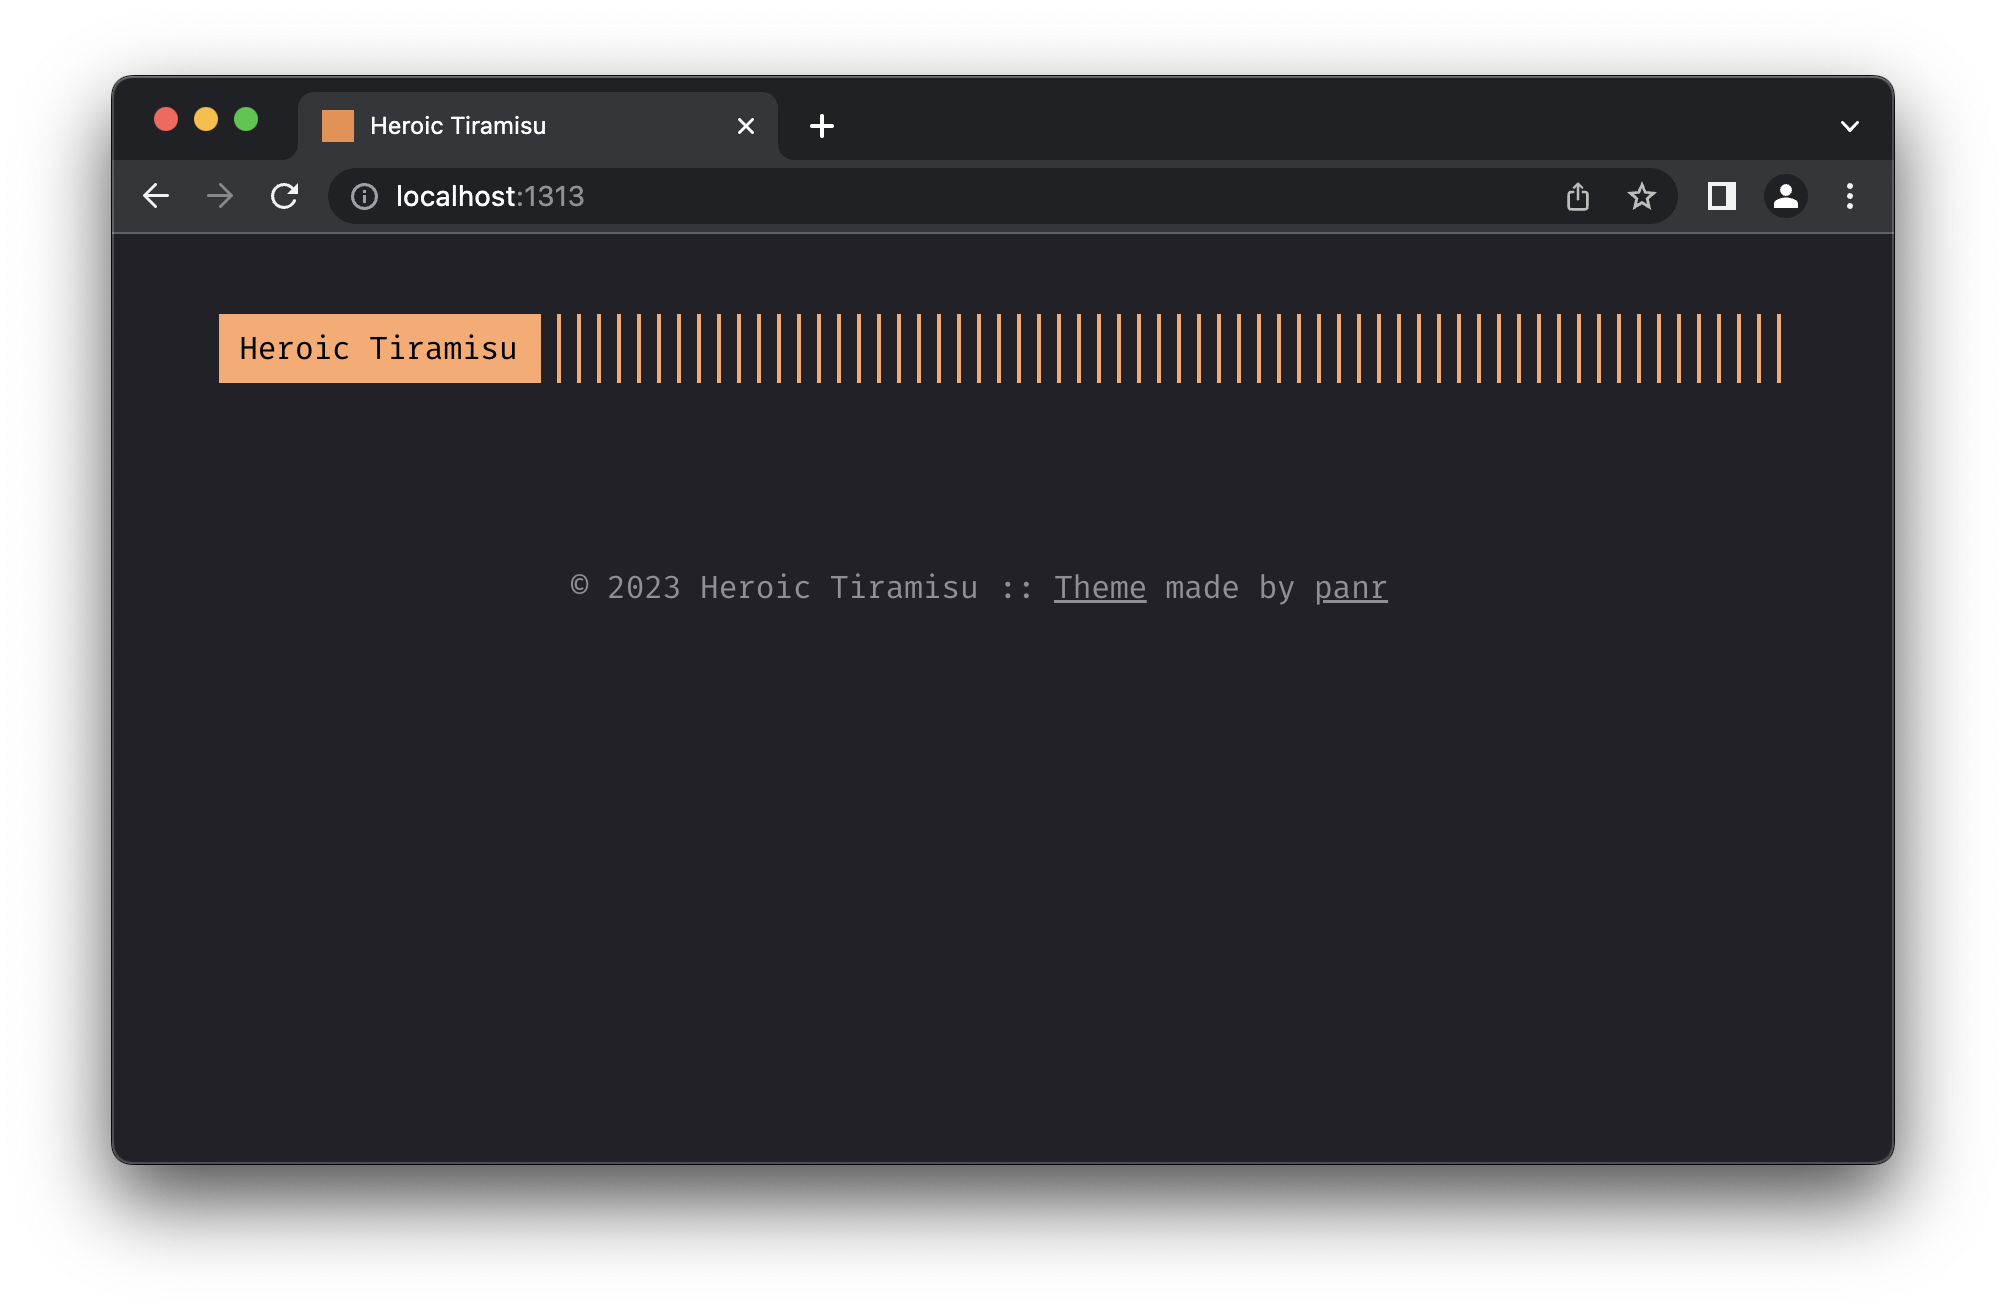
It doesn’t look like much right now—we can only see the header and footer. But still, our website is coming along!
Let’s stop the server for now. Switch back to the Terminal application and press both the Control and C keys on the keyboard. Later, after we add some content, we’ll start the server again to see what our website looks like with blog posts.