The Static Site Guide • Chapter 1
Making Your First Web Page
Let’s get started! It’s time to make our first web page from scratch, using nothing but HyperText Markup Language (HTML). It’s the primary markup language for web pages.
To make the web page, we’ll use a text editor. You’ll create what’s called a plain text file and add HTML tags. When we open the plain text file in a web browser like Google Chrome or Safari, the web browser will read the HTML and render the web page on our screen.
Finding a Text Editor
As you might guess from the name, a text editor is an application that allows you to edit text. We’ll use it to create and edit our HTML and CSS files. People commonly use text editors to edit plain text files, configuration files, and even programming language source code files.
Most operating systems provide a text editor. For example, macOS comes with TextEdit, and Microsoft Windows comes with Notepad. You can use one of those applications, but there are better options available.
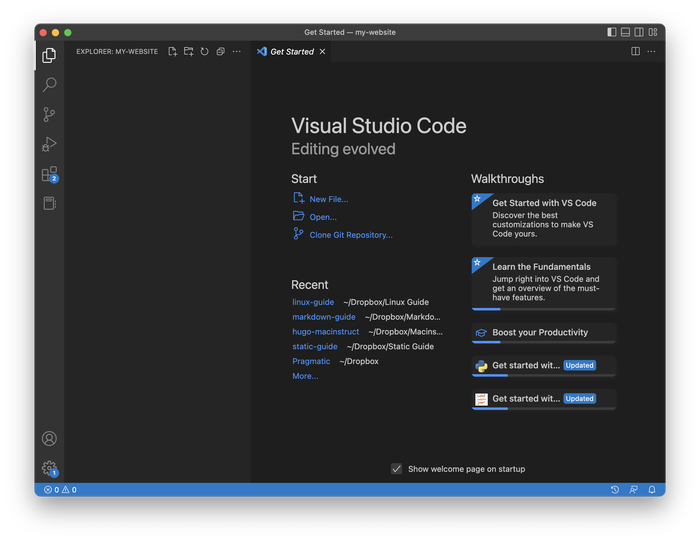
I recommend using Visual Studio Code (also referred to as “VS Code”). It’s free, it works on every platform, and it has more features than the text editor that comes with your computer. The screenshot below shows what it looks like when you open it for the first time.

Once you’ve installed and opened VS Code, leave it up on your screen—we’re going to start using it in just a minute.
Setting up the Directory Structure
Now we can create the directory structure for our website. A website consists of a set of files stored in one or more directories (also called folders) on a computer. Initially, our website will only have one directory and one file, but as we progress through this guide, we’ll create more directories and add more files.
Go ahead and create a folder called my-website on your computer. You can put the folder on your Desktop or inside another folder. The precise location doesn’t matter—just remember where you put it.
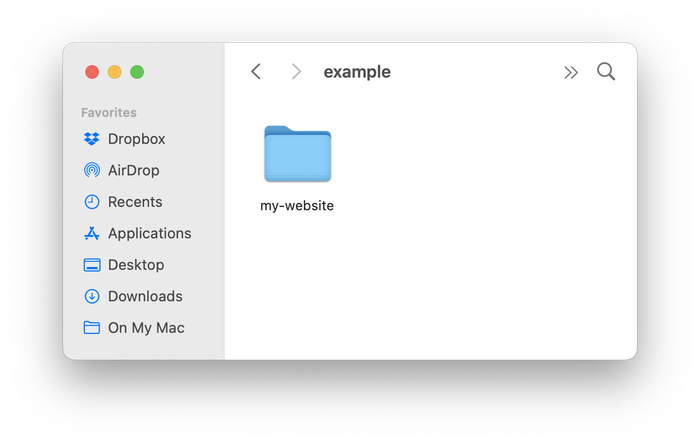
Now let’s open the folder in our text editor. Switch back to VS Code and select Open Folder from the File menu. Select the folder you just created. The folder should appear in the sidebar, as shown below. (If you don’t see the sidebar, you can turn it on by clicking the View menu and selecting Appearance > Primary Side Bar.)
From now on, all of the files you create in the my-website folder will appear here, in the VS Code sidebar. You can use the sidebar to quickly open files and navigate your directory structure.
I’ll occasionally show the directory structure so you know which files should be in which directories. For example, our directory structure might look like this later:
my-website
├── file1.html
├── file2.html
└── folder1
    ├── file3.html
    └── file4.html
When I need to share the location of a single file, I’ll write the path like this: my-website/folder1/file3.html.
Creating a Web Page
We’ve created the directory for our website and we’ve opened the directory in VS Code. Now we’ll create a new file in that directory for our first web page. Do this by selecting New Text File from the File menu in VS Code.
To help you get started, I’ve created some sample HTML that you can use. Copy and paste the sample code shown below into the new file.
<html>
    <head>
        <title>My First Web Page</title>
    </head>
    <body>
        <h1>My First Web Page</h1>
        <p>Hello, world! This is my first web page.</p>
        <p>Stay tuned!</p>
    </body>
</html>
Save the file by selecting Save As from the File menu. Name the file index.html and save it in the my-website folder.
.html part is the file extension—that’s how web browsers know that the file is a web page. Second, web servers and web browsers universally recognize that index.html is the homepage of the website. This will be important when we upload our web page to a server.Now our directory structure looks like this:
my-website
└── index.html
Viewing the Web Page in a Web Browser
Let’s take a look at what your web page looks like when it’s rendered in a web browser. Open Chrome or Safari, and then select Open File from the File menu. Browse to the my-website directory on your computer, and then open the index.html file. You’ll see your web page in your web browser, as shown below.

Here’s what just happened: When you opened the HTML file in your web browser, it read the HTML and rendered the web page on your screen. Congratulations! You just created your first web page.
index.html file, you can reload the web page to see the changes.Viewing the Web Page’s Source
We saved the HTML for our web page in a file on our local hard drive, but now that we’ve loaded the web page in our web browser, we can also view the HTML from within our web browser. Let’s try viewing the source of our web page.
If you’re using Chrome, select View Source from the View > Developer menu. You’ll see the HTML of your web page in your web browser, as shown below. It looks exactly the same as the HTML you wrote in VS Code. It’s just the same index.html file.

“Viewing source” is a useful trick to examine the HTML of other web pages on the internet. For example, if you’re wondering how a website created an element, you can find out by viewing the source and inspecting the website’s HTML.
HTML Crash Course
Let’s pause for a moment and talk about HTML. The first thing you should know about HTML is that it’s a markup language, not a programming language. In other words, HTML is used for creating and formatting documents, not for writing computer programs.
When you write HTML, you use HTML elements to structure the document’s text by wrapping it in HTML tags. HTML tags control where text appears on the screen and how it’s formatted. An HTML tag consists of the element name wrapped in angle brackets. Most HTML elements have opening and closing tags. The presence of the slash (/) indicates that a tag is a closing tag. You can see an example of a complete HTML element below.

Let’s look at the sample HTML we pasted into the index.html file. The first tag is <html>. Every HTML file needs this tag. It indicates that this is an HTML document and that everything between the opening <html> tag at the beginning and the closing </html> tag at the end is HTML.
At this stage, the tags between the <head></head> tags contain meta information about the file. We already have the title in there between the <title></title> tags—that’s the web page’s name in your web browser. The <body></body> tags mark the beginning and end of the content that appears in the web browser window. For example, the <p> tag marks the start of a paragraph, and the </p> marks the end.
To help you get started, I’ve created a table with examples of some of the most common HTML elements.
| Element | Example | Rendered output |
|---|---|---|
| Heading | <h1>A heading</h1> | A heading |
| Paragraph | <p>This is a paragraph</p> | This is a paragraph |
| Bold | <strong>This is bold</strong> | This is bold |
| Italic | <em>This is italic</em> | This is italic |
| Horizontal rule | <hr> | |
| Blockquote | <blockquote>A quote</blockquote> | A quote |
| Link | <a href="https://www.example.com">This is a link</a> | This is a link |
| Image | <img src="image.jpg" alt="An image"> |  |
| Unordered list | <ul><li>first</li><li>second</li></ul> |
|
| Ordered list | <ol><li>first</li><li>second</li></ol> |
|
You don’t need to memorize these, but feel free to experiment with them as you go. I just wanted to give you a sense of what some of the most common HTML elements and tags look like.